One of my professional interests is Project Management and Leadership, so I took a course in Project Management from UCLA Extension this last Spring. I'm happy to announce that I passed the Certified Associated in Project Management exam from the Project Management Institute and I am now officially a CAPM!

Awards and Festivals, Design, Games, Writing
My GDC Talk is Now Available in the GDC Vault!
I’m pleased to announce that Flavors of Challenge: Designing to Support Engagement in Deeply Challenging Games, is now live on the GDC Vault!
The reviews are in as well! The talk received 93% positive responses and 54% of those responses were “Excellent”, the highest possible rating!
Selected reviews:
“One of the best and funniest talks.”
”AMAZING talk, top 3 of this year for sure.”
”When's your book coming out? I'd buy it!”
”THE SINGLE BEST GDC TALK I HAVE ATTENDED.”
”Insightful talk about ways to introduce difficulty in games in ways that are rewarding instead of punishing to the player.”
Check out the talk on the GDC vault here: https://gdcvault.com/play/1035836/Flavors-of-Challenge-The-8
If you don’t access to the GDC vault, I am planning on releasing the essay that spawned this talk soon! Watch this page!
I’m also considering turning this talk into a larger book. If you are a publisher or have contacts in the publishing world, please contact me below:
Yargh Update #2: Publisher Notes and PAX
Addressing Publisher Notes: Randomness
Shortly after the publication of our most recent blog post on Yargh, we submitted the game to a handful of publishers. While some publishers expressed admiration for the marketing package we had created and thought our game looked interesting, none asked for a playtest. When we asked for feedback, those that replied said that they felt the game seemed too random.
Around the same time, we had a number of playtests that went poorly. While previous playtests had ended with some playtesters saying this was one of their favorite games ever, this more recent set of playtests ended with playtesters frustrated because there was mathematically no way for them to win the game.
This section will be about how we made our game fairer and less random while preserving what made our game fun. (This post will assume you are familiar with the core mechanics of the game, which can be found here.)
Calming the Seas of Randomness
When pitching to publishers, there is the amount of randomness that appears to be in the game and there is the actual randomness that is in the game. When some publishers said they felt the game was too random, our initial reaction was that the game only seemed random because of our Chaos Dice, which were d6s with unique sets of faces like [0,1,5,10,15,20] or [8,8,8,16,16,16]. Given this, our instinct was to simply reduce the prevalence of these dice in our marketing materials.

But as we looked closer at our game, we realized that it actually had many sources of randomness.
Most glaringly, there was the problem of our Monsters. In a nutshell, they were designed in a way that created an experience that was sometimes too easy and sometimes too hard. During our Navigation phase, Players would choose between three randomly selected Monsters. Each Monster would have a level that would signify how difficult it was: 1 was easy, 2 was moderate, and 3 was hard. The Monster would have a Health value, Attack value, and targeting style, tuned in aggregate with their overall level. A Level 3 Monster, for example, might have high health and high attack while a Level 1 Monster had the opposite.
The problem with this approach is that our players’ power did not scale with the challenge the monsters were presenting. If the player drew 3 Level 3 Monsters, it was likely that they would die to the monster. If the player drew 3 Level 1 Monsters, the challenge the Monsters presented would be trivial. In addition, because level 1 Monsters gave less rewards, players who chose to fight them were less prepared for future rounds of play. This created a negative feedback loop where weak players stayed weak because they could only afford to challenge easy monsters.


Another problem was that the reward you got for beating each monster was proportional to how difficult they were. If the Player defeated a Level 3 Monster, they would get Power Cards, Artifacts, and a new Die. If they defeated a Level 1 Monster, they would only get Power cards.

An early draft of our loot table.
At first, Matt and I were at a loss as to how to solve this problem. It made sense to us that the more difficult Level 3 monsters would drop better loot and vice versa. But playtest after playtest showed us this made for an uneven experience.
To rethink how we could solve this problem, I read part of the excellent book Game Balance by Ian Schreiber and Brenda Romero. This book provided a useful vocabulary for talking about feedback loops and power-scaling. I learned a lot from this book but one of the most important lessons I gleaned was the importance of knowing the journey you want your players to go on. When we had first started working on Yargh, our focus had been on creating a game that spun up dramatic moments - what we had ignored (to our peril) was the journey that those moments were part of. We knew the scenes we wanted but we didn’t know the story. As a result, during some games, players would get weaker and weaker as the game progressed. During others, they would become far too powerful too early. It was hard to predict what experience the game would produce.

While searching for answers, we also took a closer look at how some of our inspirations handled the question of balance, namely Slay the Spire: The Board Game and Dicey Dungeons. We noticed that these games never took power permanently away from the player when the player faltered and that these games did not leave difficulty to chance. Both of these games had a small pool of enemies for the start of the game, another set for the mid-game, and a completely different set for the end-game. Revisiting these games made us rethink how we wanted to present monsters in Yargh.
Instead of each Monster having its own level, we decided that a Monster’s health would be determined by two factors: the round the players were in and the number of players.
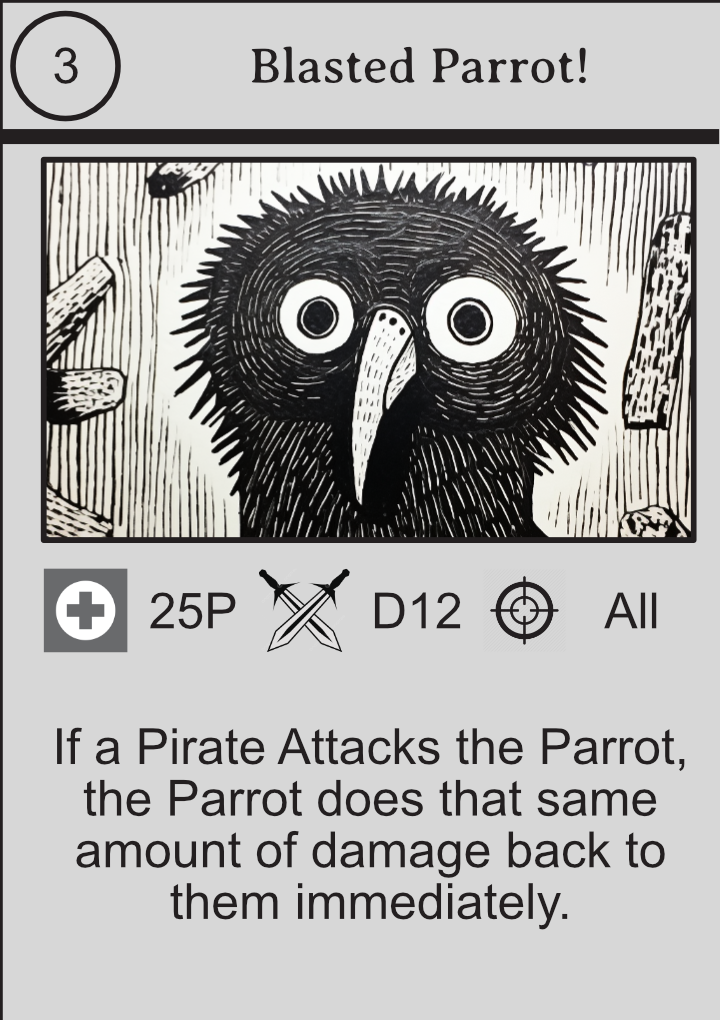
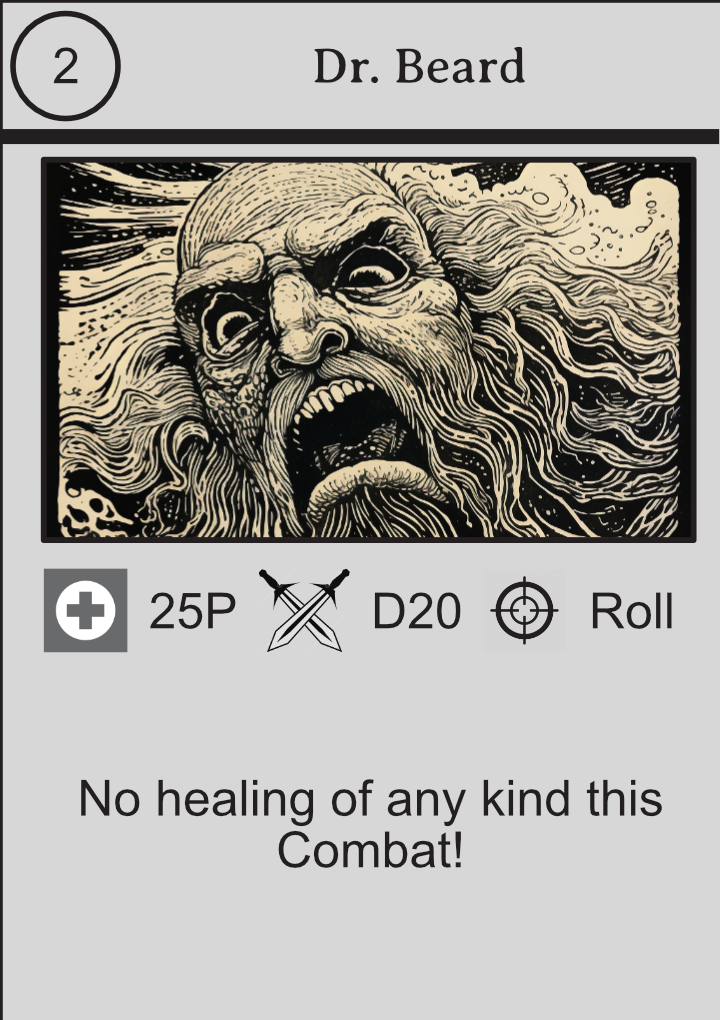
To further simplify the Monsters, we also had the Monster’s attack scale with the round. This meant that the Monster would attack with 1d20 in round 1, 1d20 and 1d12 in round 2, and 2d20 in round 3. Therefore, the only thing unique to each monster was their name, picture, and special effect. This meant that each monster had a distinct flavor but was also presented roughly the same challenge to the player. Over the course of the game, the monsters would get progressively more difficult.


The table below lays out the stats for every monster in the game.

To match the monster’s gradual ramp up of power, we also changed how the player gained power. Instead of getting rewards based on how difficult the monster they killed was, players always got 1 die, two Power cards, and two Artifacts. This meant there was a linear relationship between how far the player had progressed in the game and how powerful they were. Combined with our ramping up of the Monster stats, these changes made for a game that was consistently moderately challenging because the player’s strength grew with the monster’s strength. We had struck the right balance of boredom and challenge. The winner of the monster-player battle was largely determined by skill.

Another major change that we made was changing how we handled player death. In early versions of the game, players would permanently lose 1 die or all their artifacts if they died. The problem with this approach is that it was too punishing. When a player lost a die, it was next to impossible for them to get back in the running for first place; dice were simply too important. For this reason, we introduced “Curse Cards”, which counted against a player’s score and temporarily disabled one of the player’s action card slots. Players would draw one of these cards when they died. This solution was punishing enough that players were scared of it but not so punishing that it doomed players.

Our original rules around death.

Players could dispel a curse card by placing dice that fit that card on top of it.
These changes were a huge improvement over the chaotic progression curve we previously had. One of the main insights we learned from these changes is that players should only get stronger during a game, never weaker.

We had removed the biggest source of our game’s randomness but there was still more work to do: we listed every element of our game that was affected by randomness and asked ourselves whether that randomness was Input Randomness or Output Randomness. In other words, we asked ourselves whether the randomness came into play before (input) or after (output) the player chose an action. We felt that having too much input randomness would make the game feel predetermined and too much output randomness would make it feel too chaotic.
We also identified situations where one player would be better off than their opponents due to luck as opposed to skill. For example, in an early iteration of the game, each player would draw 10 cards from a pile of 40 unique cards to make their starter deck. The problem with this approach is that one player could end up with a much stronger set of 10 cards than another player. To make the game more fair, we made it so that every player had the same set of 12 starting cards.

Our 12 starting cards.

The net result of these changes is that the game felt more fair: players felt that they won or lost due to their own skill as opposed to blind luck.
However, there was also the problem of how random the game looked to publishers. To address this issue, we revised our marketing materials to feature our Chaos dice far less prominently; we instead emphasized that the game was a crunchy but accessible, semi-cooperative experience.
Finding Balance
With all these changes, our game’s economy no longer made sense. As recommended by Game Balance, we began to calculate the elements of our game in terms of each other. For example, after some calculation, we knew that our dice were about as valuable to the player as two artifacts. Thinking this way enabled us to make more informed decisions about when to give which elements. Instead of increasing or decreasing elements of the game on gut feelings, we were able to intelligently determine how increasing one element may affect another element.

Designers we trusted had also raised concerns about the number of unique dice in our game; they said that manufacturing that number of unique dice would be prohibitively expensive. To reduce the perception of randomness in our game and address that concern, we lowered the amount of unique dice in our game from 20 to 10.
PAX Unplugged
With this new version of the game in place, Matt and I decided to attend PAX Unplugged, the enormous board game convention hosted in Philadelphia each year. We rented two tables from Unpub, the Unpublished Game Network, and playtested our game with PAX participants. The response to our game was generally positive - we had many positive comments about our core dice and card gameplay. On the other hand, some players were not a fan of the amount of reading in our game, especially during the Looting phase, where players haggled over 8 Artifact and Action cards. These players suggested that we use more icons and less text - which is a change we may do in the near future.

Our looting phase. Each Player gets two of these 8 cards.


One of the most valuable moments of the convention occurred during a talk called, “Take Your Damn Turn!”. The speaker, Rym DeCoster, explored the concept of a game’s “fun economy”, which he defined as the fun a game provides divided by its procedure or busywork. He proceeded to list examples of games that were fun but too “busy”; he discussed how Monopoly was hated by some despite being fun because it had a number of mechanics that lengthened the game arbitrarily. (In fairness, the original version of Monopoly was designed to show how capitalism sucked, not create a fun experience.)
This talk opened our eyes to the amount of procedure in our own game. As a result of this talk, we took several steps to reduce busywork, such as replacing a section where the players pick between 3 cards with a section where they simply draw 1 card. These small changes decreased the time of our game and subsequently increased our fun economy! That said, there are still some changes we need to make to streamline our game.
Lessons
What’s the future of Yargh? At this point, Matt and I have dedicated more than 50 playtests to the development of Yargh (which is not to mention all the work required to design the game in between those playtests.) While there are still improvements to be made, particularly around the streamlining of the game, we feel that most of the ideas we have left would ultimately result in a fundamentally different game. The game we have created is balanced, fun, and complete, so we are stopping development at this stage unless we receive notes from an interested publisher.
Yargh was a fun game to develop and it taught me a lot about game design. Here are some of the most salient points:
If you think your game is done playtesting, it’s not!
Once a board game has been sufficiently developed, any change to its design will have large ripple effects. Before making a change, ask yourself all the ways your change may alter player behavior. What strategies could become overpowered or underpowered? What new strategies might emerge? Will existing mechanics become more or less significant?
Randomness plus player agency can be fun. Randomness multiplied by randomness is chaos.
Your hook is the experience you create - not your components.
You will get far more critical playtest feedback from designers you don’t know than you will from friends. This is both a good and bad thing. Your game will be held to every scrutiny but that scrutiny is not always indicative of how the average person will perceive the game. Sometimes, other designers will give you the tough love you need. Sometimes, they will be clouded by their own version of what an ideal game is. In the latter case, ask yourself whether you and this other designer have the same values.
There are some mechanics that are considered “hardcore” and some that are considered “casual”. If you mix them too liberally, you may make a game that isn’t a great fit for either group.
A game is the median experience it creates, not the average. A balanced game is not an experience that is sometimes easy and sometimes hard. It’s a game that is consistently the right difficulty.
When you design your game, you should be able to articulate the journey you want your players to go on. For example, in Yargh, like many games, we wanted to increase the game’s complexity, difficulty, and power-fantasy for the player in an exponential fashion. For too much of Yargh’s development, we let randomness shape a large part of the player experience and we sometimes fooled ourselves into thinking the game was in a better place than it actually was when playtesters had a very fun experience.
You can learn more from your playtests by writing down the exact changes you’re testing and their observed effects. Matt and I would end every playtest by breaking down these observed effects and brainstorming solutions to new problems that had arisen. Those solutions then became our next set of changes.
You should be able to know roughly how far a player is into your game by looking at their playspace. If you cannot, the experience may be too loosely tuned.
Sometimes, that funny/cool/twisty card you love is the card that’s ruining the balance of your game.
Constantly ask yourself, “why would a player want to do that?” Break down their motivations mathematically. For every decision in the game, ask yourself if there is a dominant strategy that you have shaped.
I’m far from the first person to say this (which is true for all of these points), but if players need to use a turn guide throughout your entire game, it’s probably too complex for most players.
Thank You For Reading!
Yargh! Update #1: Evolving Towards Fun
Ahoy there!
In this blog post, I will share some of the design lessons my co-designer Matt O’Connor and I learned while designing our game Yargh! An Odd Dice Odyssey. This essay will show how we approach design problems as a team and some of the mechanics that make Yargh fun!
I’m not going to explain the rules of Yargh within this post, so if you’re unfamiliar with the game, I recommend reading our description here or watching the video explainer below:
Evolving Towards Fun
Designing Yargh was fun because it evolved organically. We started with mechanics we enjoyed, combined them together, playtested them, then solved the problems that emerged. There was no grand vision at the project’s offset, so there was room to marinate on problems and grow the game towards fun. For this reason, I will structure this essay chronologically. In each section, I will discuss design problems that arose and how we solved them.

Our sell sheet.
north stars
Though there was no grand vision for Yargh, there were principles that my co-designer Matt and I adhered to from the beginning. Above all, we subscribed to legendary game designer Sid Meier’s idea that great games are fundamentally a series of interesting decisions. Whenever we were unsure of what to do next, we aligned the game with this maxim:
“Games are a series of interesting decisions.”
— Sid Meier
Matt and I started work on Yargh because we were part of the same board game group. More importantly, we liked the same parts of games: the deckbuilding of Dominion, the drama of Yahtzee, the teamwork of Gloomhaven. These shared tastes served as a foundation for many of the mechanics in Yargh.


Our first step towards Yargh came from a prank. At the time, I was often playing Super Mario Party, which has an interesting mechanic where each character has their own custom die. Wario, for example, has a dice block that can roll either a -2 or -6. I thought this was a fun way to represent characters, so I bought several wooden blocks and began drawing odd sets of numbers on them in sharpie like [0,0,0,0,1,-2], [5,5,5,8,8,20], and [1,1,10,10,20,20]. I would then sneakily substitute these strange dice into dice-centric games like Catan or Yahtzee and act offended when they weren’t recognized as legal dice.

There was something toylike about rolling these funky dice, which we nicknamed Chaos Dice. Matt and I noticed that people enjoyed playing with these dice, so we decided to make a small game with them.

The other half of our core loop was our Action Cards. These were inspired by Dicey Dungeons, one of the all-time great dice games. Among other things, I loved how Dungeons handled combat – Players would roll standard D6s then place them on cards that would activate abilities. Players could create combos by placing dice on cards that would allow them to draw more cards or roll more dice. It was an elegant system that was addicting and easy to understand.

We wanted to put our own twist on this idea by combining our Chaos Dice with our own set of brand-new “Action Cards”. Below is a picture of our early cards. This combination of our new Action Cards and the Chaos Dice immediately felt fun and fresh - if chaotic.

With our core loop in place, we needed a framework to give this gameplay meaning. An early touchpoint for us was Marvel’s Legendary, a semi-cooperative deckbuilding game. In Legendary, you and three other players build a deck of Marvel heroes and deploy them to fight a series of villains pulled from the top of a “Villain Deck”. To end the game, you have to battle a tough “Mastermind” character like Doctor Doom or Ultron.

Players would either lose to the Mastermind as a group OR defeat the Mastermind as a collective. The surviving players would then count their scores and a winner would be declared. This structure fostered a gaming experience that was mostly “Nice” cooperative play with a little “Mean” competitive play at the end. The only problem we had with Legendary was that it was boring to wait for other player’s turns to end. So we wanted to try a similar structure with an increased emphasis on player interaction.

We called our “big bad” a “Terror of the Sea” and we made the objective of Yargh to defeat this ultra-difficult monster. The survivors of this battle would then enter a scoring phase reminiscent of the standoffs in the Pirates of the Caribbean movies - this helped differentiate from the earlier games mentioned and fit snugly with our pirate theme.

Lost at Sea
Legendary and other cooperative games like Pandemic would often guide players through their “campaign” with a deck. At the start of each turn, Players would draw from the top of the campaign deck and then resolve whatever “event” was on that card. This was a fun design but it did make those games feel predetermined and linear at times. So we experimented with ways of presenting choices to our Players that were more dynamic.

After trying a couple of ideas, we came up with the idea of having the “Crew” of Players choose between three Monster-Island pairs that were drawn and paired at random. After the Crew chose a pair, they would fight the Monster then visit the Island. To give the game a greater sense of danger, we instructed Players to turn the third Monster-Island pair face down so that it was effectively random. The choice of which Monster-Island pair to visit was interesting because sometimes a difficult monster would be paired with a good island and vice versa. We designed our monsters and islands to be pointy - good in some contexts, bad in others - so that it was never an easy decision to visit one island over the other.
Below are some of our Monsters and Islands.


Tiebreakers
However, there was no tiebreaker if half the Crew wanted to visit one Monster-Island pair and the other half wanted to visit a different Monster-Island pair. To solve this problem, we introduced Duels – when two Players disagreed about anything, they would each roll one of their Chaos Dice. The Player who rolled the higher number would win the Duel and get their way.
As you can probably tell, this gave a huge advantage to Players with Chaos Dice with higher numbers. Thus, the Tide Coin was born. The Tide Coin was our way of creating parity between high-rolling and low-rolling dice. When the Tide (Coin) was High, high numbers won Duels. When it was Low, low numbers won Duels.

too much random
Once we had these core mechanics in place, the game took on a new wind. Yargh had a unique feel because it combined crunchy sudoku-like number-puzzling with twisty dungeon-crawling. However, at this point, there was too much randomness in our game. When a Player was rolling Chaos Dice to combine with their Action Cards, it was too easy for them to get a roll that was incompatible with their Action Cards. Playtesters enjoyed how unpredictable the game could be but didn’t feel like they had enough agency.
To give the Player more agency, we introduced Charms. Charms were tokens that Players could use to reroll their Chaos Dice. This gave Players the chance to achieve more powerful dice-card combinations.
The question quickly came up in subsequent playtests – could a Player reroll another Player’s dice? Our gut reaction was that that would feel unfair. But then I remembered a lesson from one of my first Game Design courses at NYU: don’t introduce exceptions to your rules! So we tried a version of the Charms where they could reroll ANY dice and immediately knew it was the right direction. It was particularly fun to reroll dice during Duels, where the Player would have strategic decisions to make about which dice to reroll.

Boredom during Other Players’ Turns
To paint a simplified picture of the game at this point in development:
The “Crew” of Players would choose which Monster-Island pair to visit during the Navigation Phase. When there wasn’t a consensus, they would Duel.
They would fight the Monster guarding the Island.
During Combat, each Player would take their turn:
Roll their Chaos Dice.
Use Charms to Reroll any dice they didn’t want.
Place their Chaos Dice on Action Cards to attack the Monster.
Repeat this cycle until they fought a Terror of the Sea at the end of the game.
While our Action Card/Chaos Dice gameplay was greatly improved by the Charms, there was still a big issue – the game was boring during other people’s turns. Since it took each player a while to figure out which dice they wanted to combine with their cards, there were long lulls in the gameplay loop.
To decrease player downtime, we made two key changes. First, we made it so that all players would roll their Chaos Dice and take their turns simultaneously.
Second, we introduced dice-trading. This meant that all Players could trade their dice 1-for-1 during Combat. This mechanic changed Yargh from a competitive game to a semi-cooperative game. Part of the reason I think this cooperative gameplay immediately resonated with players is that it increased the number of fun moves a player could make while not making Combat any more complex.
With this new rule, player interaction flourished: players could help their teammates do 4 or 5 times more damage by trading the right dice. On the other hand, they could kill their teammates by withholding a die that could activate a much-needed health-giving Action Card.
Trader Woes
But dice-trading also created new logistical questions: if you traded your dice, would you get it back at the end of combat? If so, how would you know who owned which dice? What if a player didn’t want to give a die back? After many playtests where these questions slowed the game’s momentum, we decided on a colorful solution: place a unique sticker on at least one face of each die.

These stickers gave each die a unique identity but also raised a new question: what did they mean? When answering this question, we asked ourselves what we could do to allow for more impactful choices and dramatic moments. From there, we came up with the Fate Die: the Fate die was a D20 that would control the value of all dice faces that had a sticker, which we called Fate Faces.

Combined with the Charm mechanic, the Fate die was an immediate hit with playtesters because it allowed Players to drastically change the state of the game in one roll. If a Player rolled a Fate Face during a Duel, they could choose to either reroll the Fate Die or their own die.
Dropping Dead Weight
While these mechanics were being developed, we were also blind-playtesting our rulebook. This meant inviting over a few friends, feeding them pizza, handing them a rulebook, and seeing what happened! Though it made us cringe at times, we did not help our playtesters unless they were way off in the wrong direction or completely stuck. This helped us get a clear idea of when and where questions would come up for first time players.
The game was a hit with playtesters! Players loved our combat and the many twists the game threw at them. But there was one big problem: playtesters would lose steam halfway through reading the rules. Though our game was fun, it simply had too much going on. We had to take a tough look at what we had built and start cutting certain features.
Our approach was to delete or consolidate any rules that provided tedium instead of interesting choices. This forced us to make some counterintuitive cuts. Most significantly, it meant cutting the concept of “Gold”, which was our main way of enabling players to buy new cards and keep track of their score. Players could earn Gold through visiting islands, defeating monsters, and deploying Artifacts. They could spend Gold at the Port, which was a Shop that sold Chaos Dice, Action Cards, Charms, and more. At the end of the game, any Gold they had acquired would count towards their final score.

Our “Market”
Why did Gold have to go? It made other mechanics worse, particularly Dueling. One of the things that gave Yargh its unique flavor was that two or more Players could Duel for any Chaos Dice or Action Card that they both wanted. By selling items in the Port, there were more cases where Players would not Duel for a Die, Card, or Artifact because they either did not have enough Gold or thought the price was too high. Thus, Duels, which made the game unique, became less common. Since the Tide Coin determined whether high or low numbers would win Duels, Gold indirectly made the Tide Coin less relevant as well. The game had many mechanics that were somewhat important instead of having a few mechanics that were crucial.
We couldn’t cut the Port entirely because it provided Players with a consistent opportunity to get better Dice, Cards, and Artifacts. To retain this functionality while streamlining the game, we decided to instead give Players these items after each Monster they fought – one for each Pirate. However, we didn’t say who got which item. This meant that Players once again had to Duel to determine who got which prize.

The other problem with Gold was that it changed how Players viewed the end of the game. Since Gold counted towards each Player’s final score, Players would hoard their Gold throughout the entire game by not buying Dice, Charms, or Action Cards. In short, they were disincentivized from engaging with the fun parts of the game. Because they were weaker, they would also often get beaten in the battle with the Terror of the Sea as well. This was not the game that we wanted to design, so we cut Gold entirely and instead tracked points through Artifacts, which were similar to “Items” in Gloomhaven or Munchkins.


analysis Paralysis
As we consolidated our game around a few core mechanics, our rulebook slimmed down, and playtesters entered the “fun” of our game more quickly. We added and subtracted many mechanics during this period – but the most interesting of these was a “Color” pass we tried for about a month.
Throughout the design of Yargh, we held to the principle that giving the Player interesting choices was our top imperative. During our “Color” pass, we created a new set of Action Cards that would be activated by the color of a dice or the color of its text. Though we were initially very excited by this idea, this design gave us literal headaches. It opened the amount of possible card-dice combinations up so much that it became difficult to feel like you ever found the optimal match of dice and cards. Ultimately, we realized that sometimes too many choices can be just as bad as too few choices.

The reason I think that our “Color” pass was a failed experiment was that we didn’t follow the “Magical Number 7” rule. This rule, which I also learned at NYU, states that humans can carry about 7 chunks of information in their working memory at a time. During a playthrough of Yargh, Players were thinking about (1) their cards, (2) their dice, (3) their teammates’ dice, (4) their teammates’ cards, (5) the Monster’s dice, (6) the Monster’s ability, and (7) their Charms. By adding more concurrent elements for our Players to focus on, we introduced too much complexity and suffocated the fun.
A Pirate’s Life for Us
The last piece of the puzzle for us was to figure out the art for our game. Our number one priority was to make a fun game first, so we never made any decisions about our game that triumphed art over design, especially since we understood that a future publisher might want to retheme the game. We knew that there were about a million other board games with a Pirate theme, so we wanted to find a unique angle into that world.
Some of my favorite art growing up was the woodcut art seen in portraits of famous pirates and “Here Be Dragons” style maps, so we commissioned some art in this style for some of our cards. Though we loved this art, it was a bit static and dry. So we tried a more humorous approach. We struck a funny contrast by using this more “serious” art style to depict silly pirate puns and visual gags. Here are some of our favorite cards:


Though we are now pitching our game to publishers, we continue to blind-playtest and tweak our game. Our biggest priority is streamlining the onboarding experience while retaining what makes the game fun and unique. While we expect the game to continue to grow (and in some cases, shrink), we’re happy with the game we’ve made so far and excited to bring it to publishers.
If you’re a publisher interested in our game, please click the button below to contact us!
New Board Game: Yargh!
I’m happy to announce that my design partner Matt O’Connor and I are in the final stages of our new board game, Yargh!
Yargh! is a dice-swapping sea-crawler where you make your luck!
You join a Crew of 2 to 4 Pirates searching for treasure on the Seas of Fate. Your dice will take you from one island to the next, where you will find treasure, Monsters, and Glory. But beware - a Terror of the Sea awaits you at the end of your voyage, ready to banish your Crew to Davy Jones’s locker! If you can defeat the Terror, you’ll be the richest to ever sail the Seven Seas!
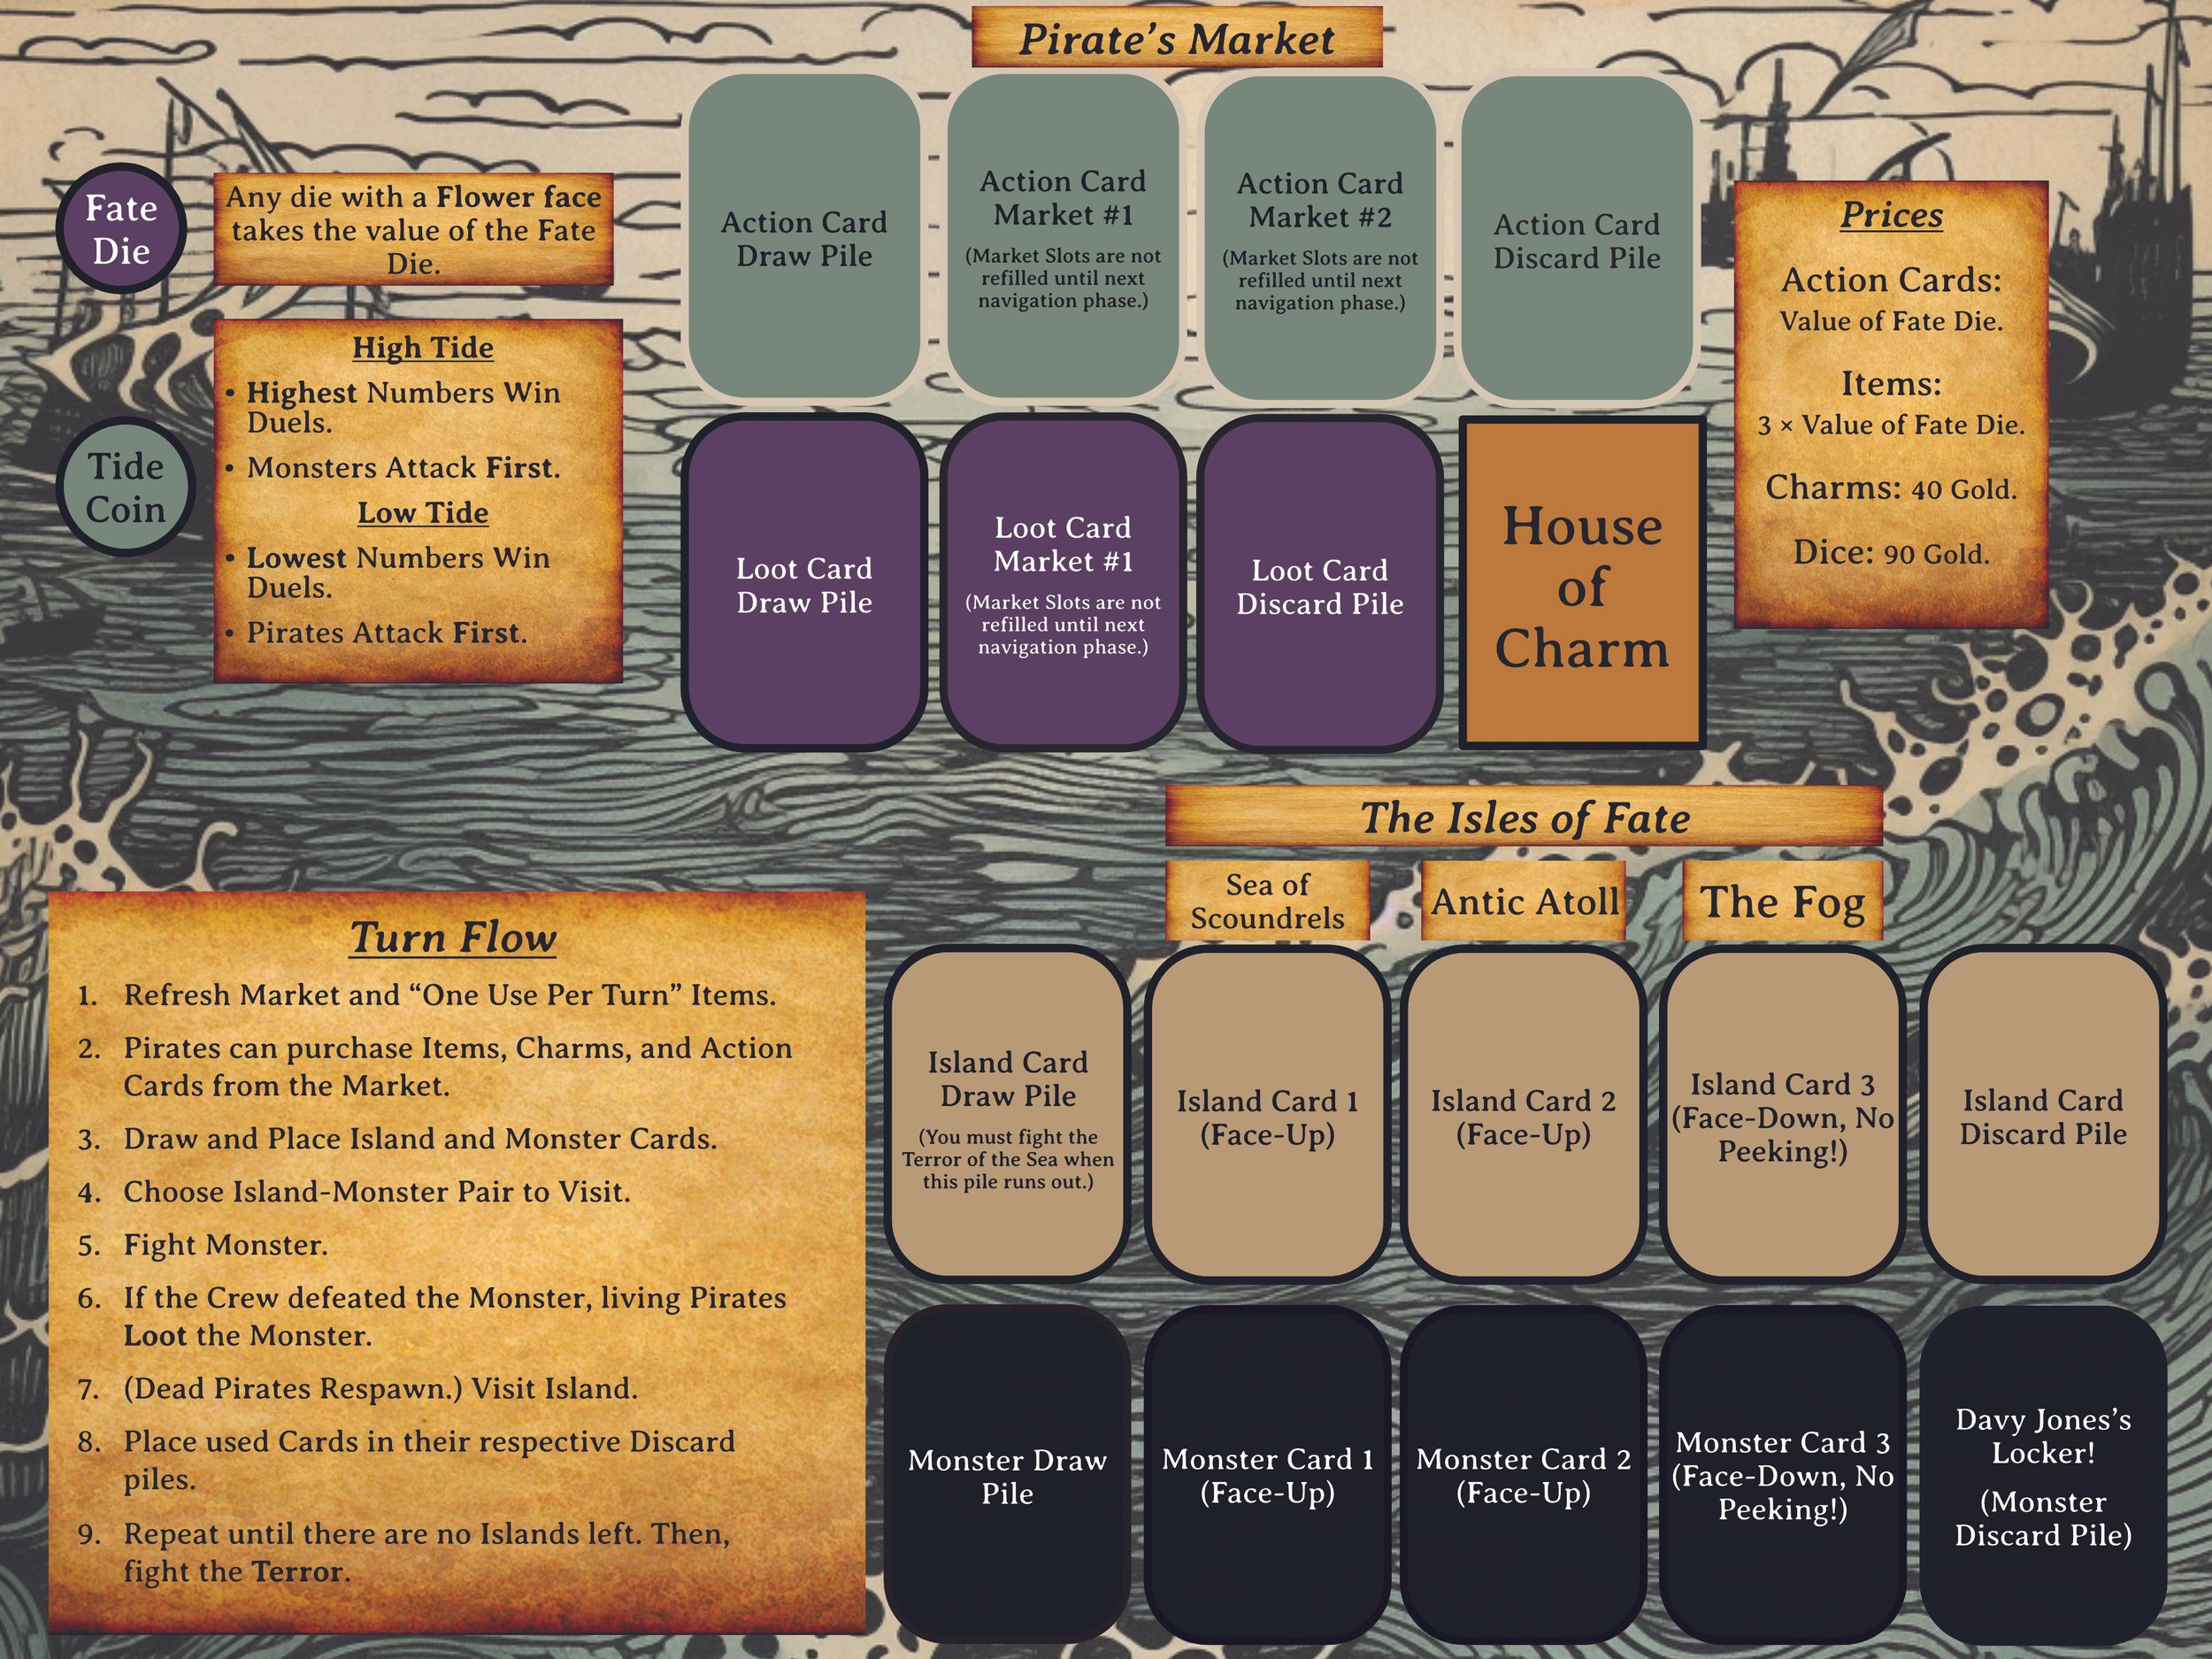
Our current game board.
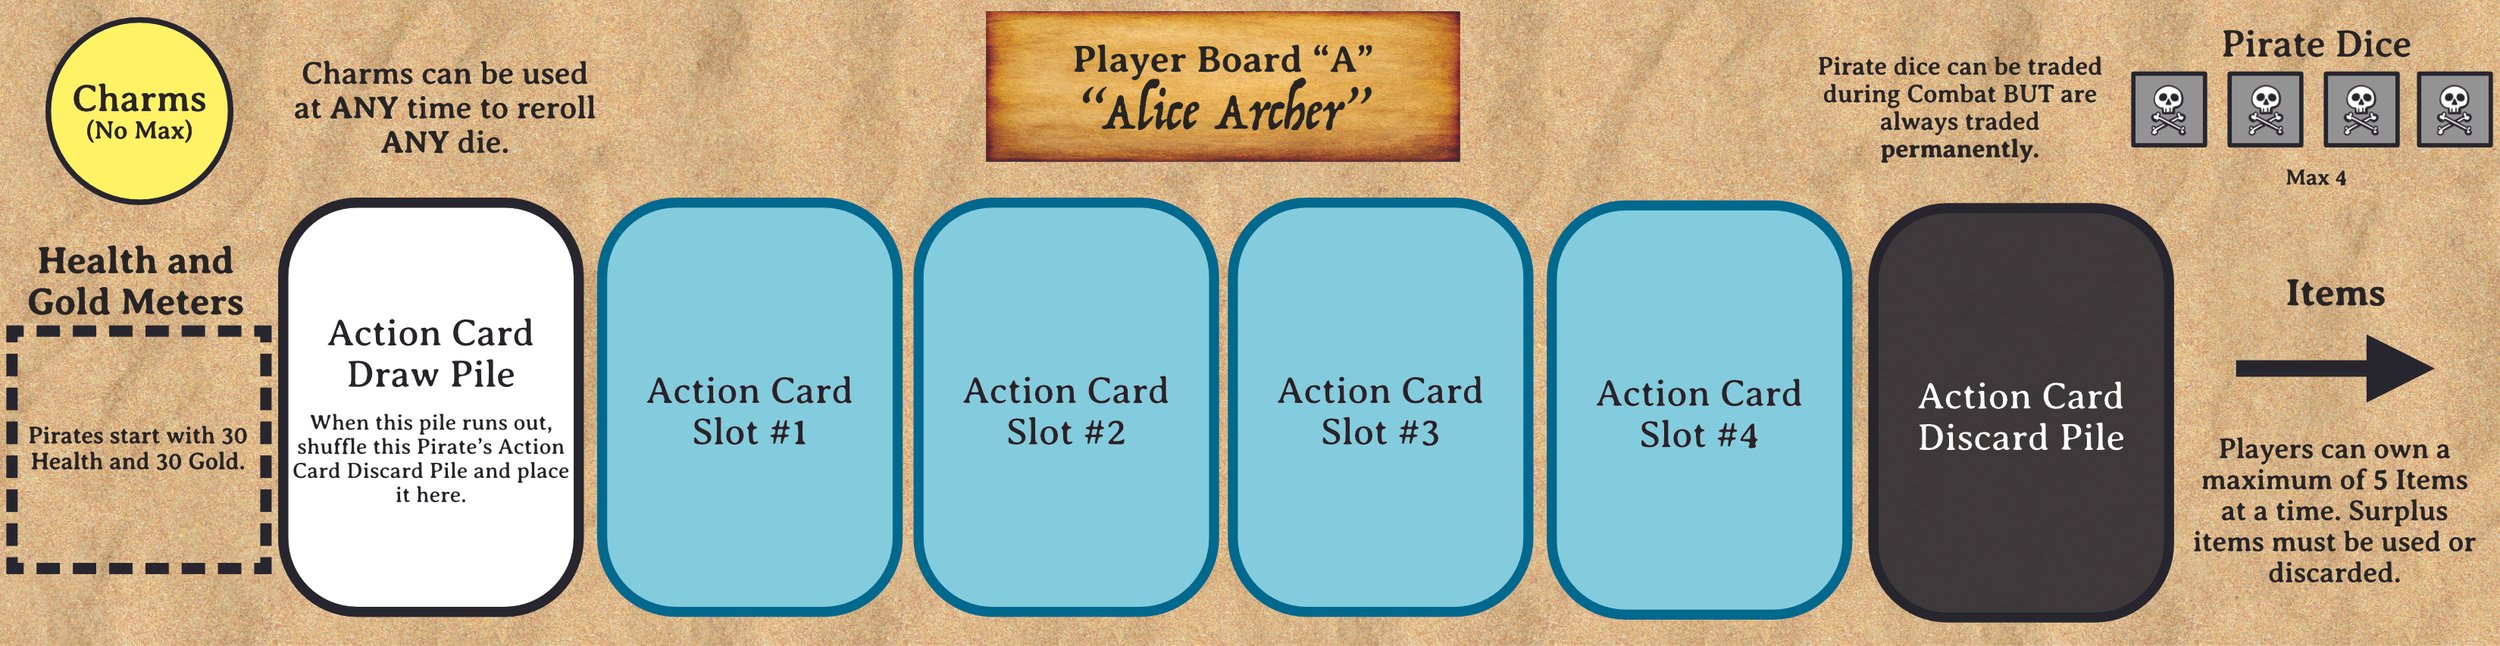
One of our four player boards.
Matt and I have been working on the project on and off for the past two years. In that time, we’ve playtested the game over 30 times and iterated on it significantly. We’re proud of the game we’ve created and will soon be releasing a short series of blogs about how we approached this project as designers.
While I will be stepping back from the project to focus on other professional pursuits, Matt will be involved in pitching the project to publishers. As a part of the pitching process, we will be releasing a simple Tabletop Simulator version of the game and a how-to video.
Watch this space and our dedicated project page for more updates!
If you are a publisher or player interested in a demo of our game, click here.
God Of War Ragnarok, Design, Games
Ragnarök's "The Slumbering Trolls" Quest: Design Retrospective
In the below post, I talk about challenges I faced while working on God of War: Ragnarök’s “The Slumbering Trolls” quest. I’m sharing this anecdote to share how I approach problem-solving as a Quest/Systems Designer.
During the production of God of War: Ragnarök, I was tasked with a creating a quest where Kratos would awaken Trolls petrified in stone by inserting a “Cleansing Rod” into stone consoles in front of the Trolls. However, as I started to work on the quest, my producer informed me that there was no longer time in the budget to create the assets originally planned for this quest Due to this, my lead informed me that the quest would likely be cut.
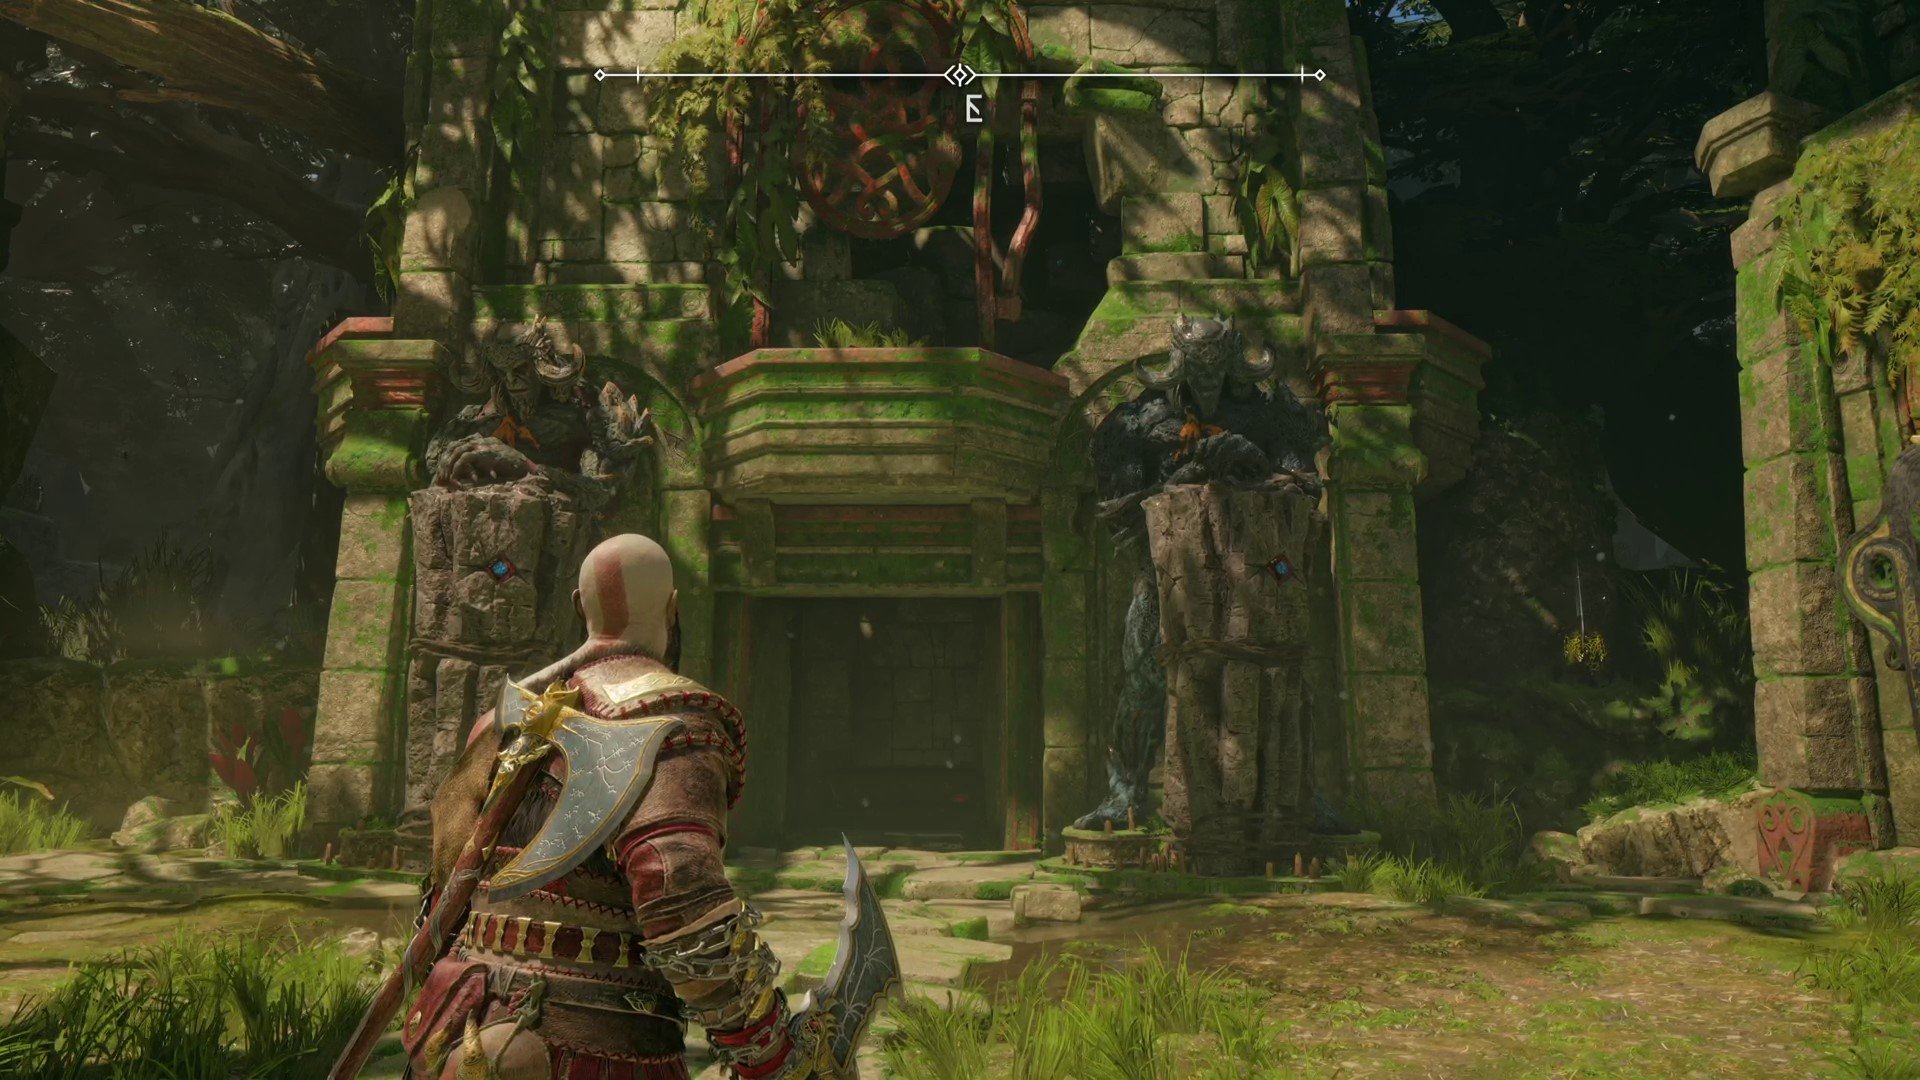
Two Stone Trolls in Vanaheim.
I knew this was a favorite quest of the team and our director, so I investigated ways that we could redesign the quest using existing assets. First, I did a review of our game’s “vision documents”, which articulated at a high-level what kind of experience our director aimed to create with Ragnarök. One of the games referenced in these documents was Castlevania: Symphony of the Night, so I played that game in my free time and took note of how it structured its quests. I noticed that many areas of Dracula’s Castle could be unlocked by using a mechanic discovered in a totally different part of the Castle, so I endeavored to have the Stone Troll quest use a similar lock and key structure.
One of the things that made this lock and key design satisfying is that you weren’t explicitly told which “keys” were for which “locks.” For example, early in Castlevania: SOTN, you come across a see-through grate that blocks your path. Later on, you find a relic called “Form of Mist” that allows you to temporarily turn into a cloud of mist. Discovering how Castlevania’s Relics interact with Dracula’s Castle was one of the high points of SOTN for me, so I wanted to emulate the same sense of discovery with this quest.
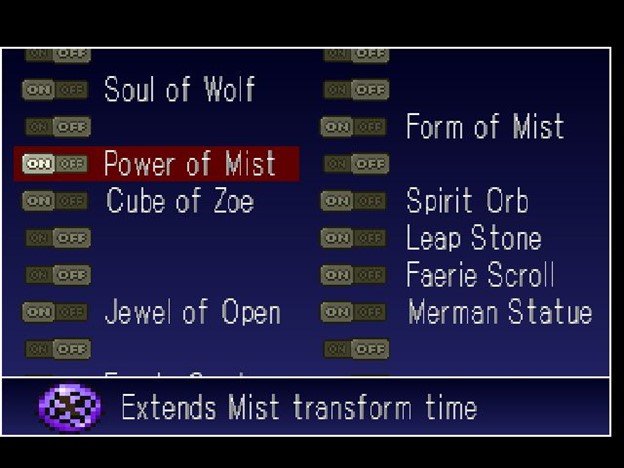
“The Form of Mist” relic (in right column) allows the player to move through grates in Dracula’s Castle.
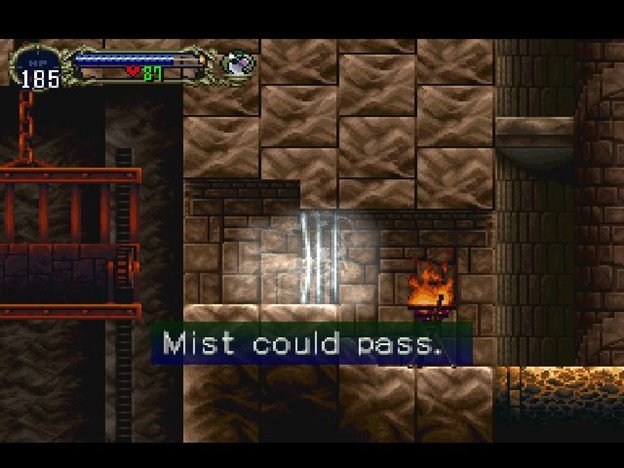
A Player uses the “Form of Mist” relic in Castlevania: Symphony of the Night to move through a grate. We aimed to replicate similar lock-and-key gameplay in the Stone Troll quest.
With that design philosophy in mind, I surveyed Ragnarök for mechanics and abilities that could be used to awaken the Stone Trolls. At first, I thought I could use the Draupnir Spear to awaken the Trolls because the player unlocked it around the same time they would have originally unlocked the “Cleansing Rod” in the original design of the quest. I felt the best way to preserve the mystery of the quest (and add some light puzzling) was to have the Player activate the Troll by embedding spears in stone Idols hidden around each Troll, similar to how the Player unlocks Nornir Chests in other parts of the game. Since God of War (2018) and the first half of God of War: Ragnarök teaches the Player that these Idols will always give the Player a reward, I felt substituting the reward for a difficult boss fight would make for quite a surprise! (I was inspired by this moment in TLOU2.) I built a quick prototype of this concept for Anthony DiMento, my lead, and he was happy with the design.

A Nornir chest in the final game that is unlocked by embedding spears in Idols near the chest.
However, I had forgotten to account for the fact that the Cleansing Rod was also supposed to unlock a Stone Dragon in the game’s Dragon Beach region. This was a problem because that region already had a Nornir Chest puzzle that used the same Stone Idols that I would have used to unpetrify the Stone Dragon. Moving that chest was out of the question, so I had to return to the drawing board.

Stone Dragon in Ragnarok’s Dragon Beach region. It was important that this dragon be unpetrified in the same way the trolls were.
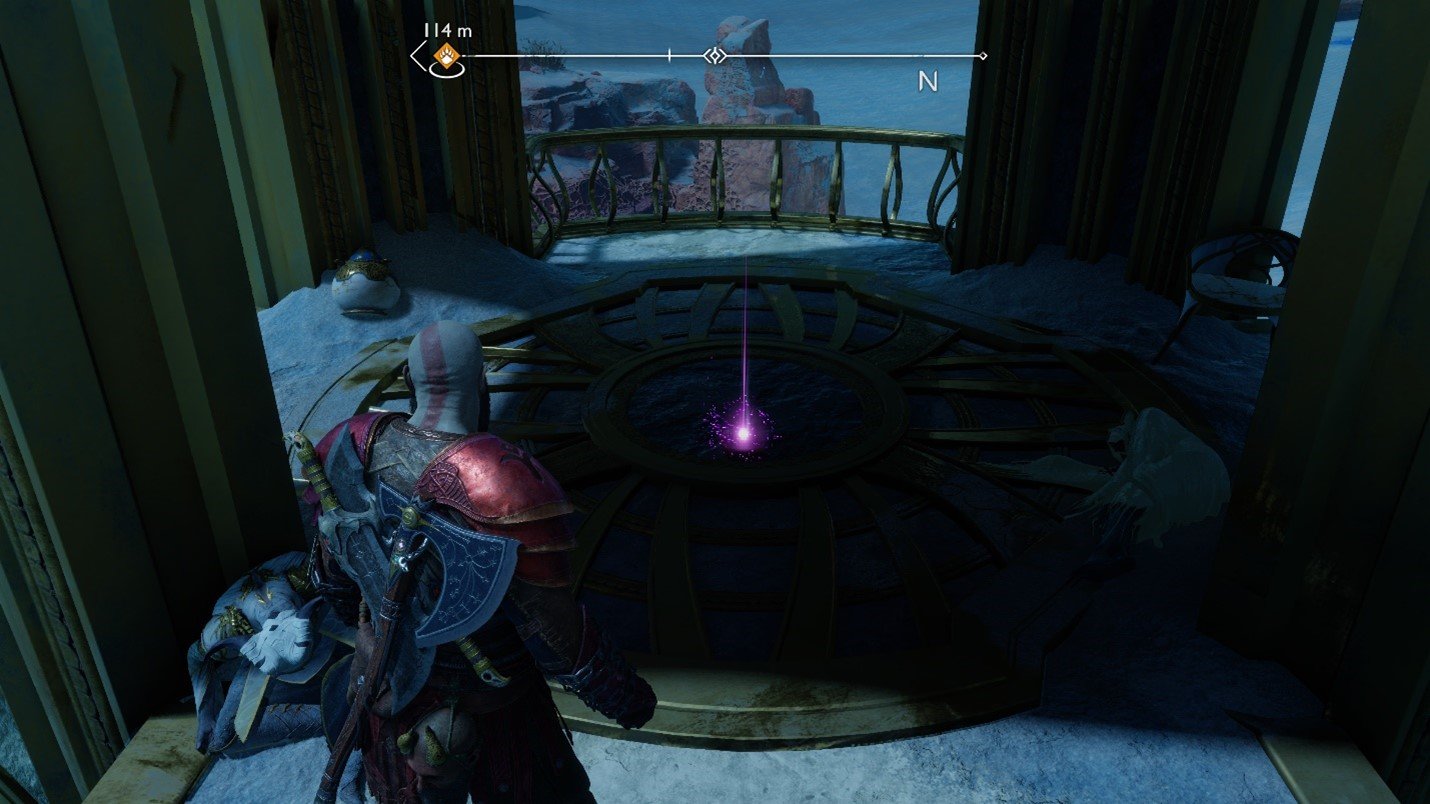
Around this time, there had been several changes to Ragnarok’s Relics, which are permanent items the Player can use to activate various combat effects. I asked my lead if we could use some of the cut Relic assets and unlock locations to create a new relic that would only unpetrify the Stone Trolls and Stone Dragon when activated. Crucially, we would not explicitly tell the Player that this Relic (the “Mystical Heirloom”) unpetrified the Trolls; we would only hint at it via banter and lore scrolls.
Both my lead and Eric Williams, the game’s director, approved of this idea. To further sell this idea, I cracked open my book of Norse Mythology and found a Dwarf called Alviss who was himself petrified by Thor. I then worked with Anthony Burch, the quest’s writer, to weave this Dwarf into our quest. Since Alviss is the character in Ragnarök who is responsible for petrifying the Trolls, I felt his mythology-dictated fate would add some funny irony to the quest (though he is technically found frozen in Ragnarök.)

Alviss is found frozen alongside the Mystical Heirloom and a lore scroll.
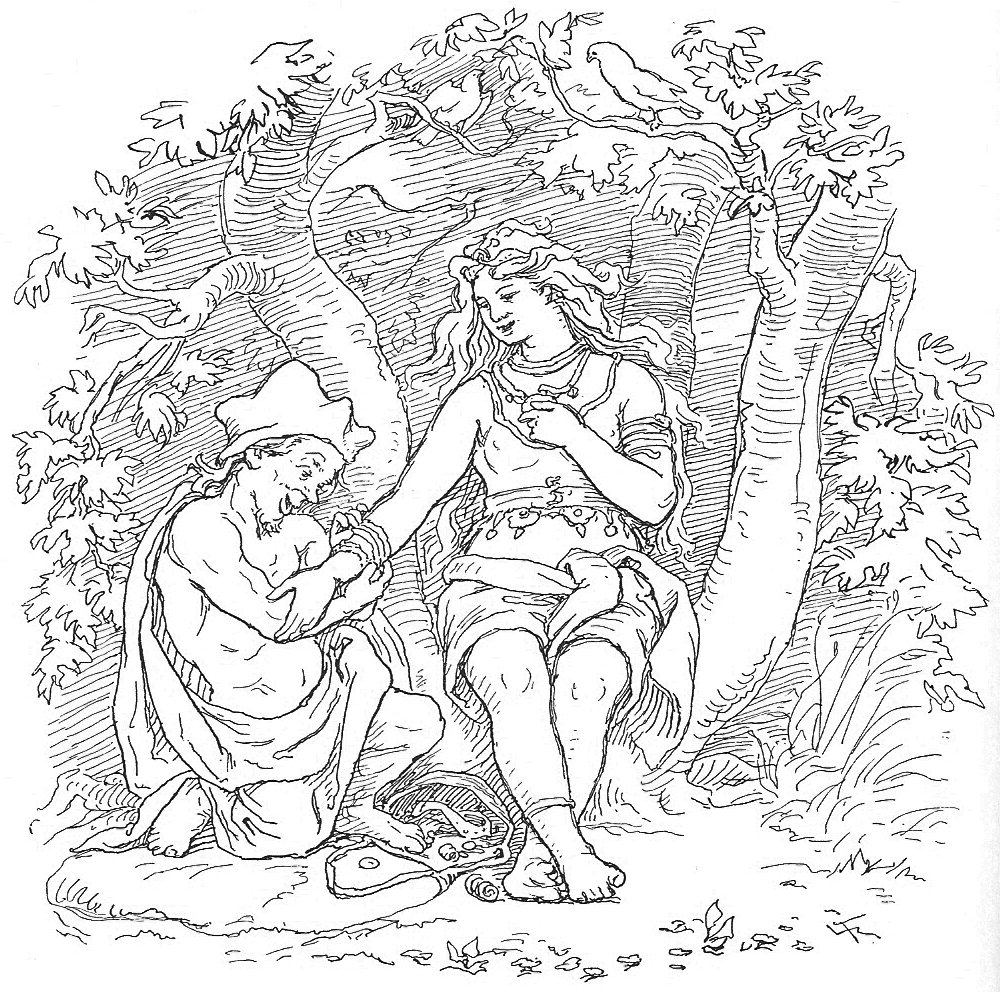
Alviss, a Dwarf who tried to marry Thrud, Thor’s daughter. Thor disapproved of this match, so he tricked Alviss into being petrified by the sun. Stone cold.
After some playtesting and tuning, we were able to implement a quest that was true to our director’s vision of the game without creating additional work for other departments. Players enjoyed the quest and IGN even did a short feature on it. I’m proud of the work I did on this quest because it made the game better and my team’s lives easier.
This quest was made by possible by working with these great people:
Writer: Anthony Burch.
Level Designers: Naomi Jade, Joel Grattan, Jacob Antonucci, Brendon Fitzgerald.
Combat Designers: Robert Rappoport, Henry Lee, and Stephen Oyarijivbie.
Senior Progression Designer: Ryan Baker.
Lead: Anthony DiMento.
Producer: Katie Tigue.
Director: Eric Williams.
Ragnarök’s Directors.
Design, Games, God Of War Ragnarok
My Work on God Of War: Ragnarök
I’m writing this post to answer a question I often get: what did I do on God of War: Ragnarök? The short answer is my official title was Associate Systems Designer and I worked on ten side quests, most of the game’s collectibles, and on the banter systems for key side characters like Ratatoskr, Brok, Sindri, and Gna. But the follow up question I get just as often is: what exactly does it mean to work on those things?
Every one of the side quests I worked on had different needs and were in different states of development when I was assigned them. Some were mostly done (“The Elven Sanctum”) and others I took from design document to the state they exist in on the disc today (“Across the Realms”). Additionally, there was a wide variety of side quests. Some were combat-focused (“The Last Remnants of Asgard”), some were puzzle-focused (“The Broken Prison”), some were narrative-focused (“A Stag for All Seasons”), and others were easter eggs (“The Slumbering Trolls.”) But even with this variety of quests, I found myself solving similar problems, even when the goal of the quest differed. So, in this post, I will look at a few of these quests and break down the issues our team faced and how we solved them. My hope is that this post can give you a better idea of how I approach problems as a designer, particularly in a AAA context.
Note: There will be significant spoilers for God of War: Ragnarök throughout this post.
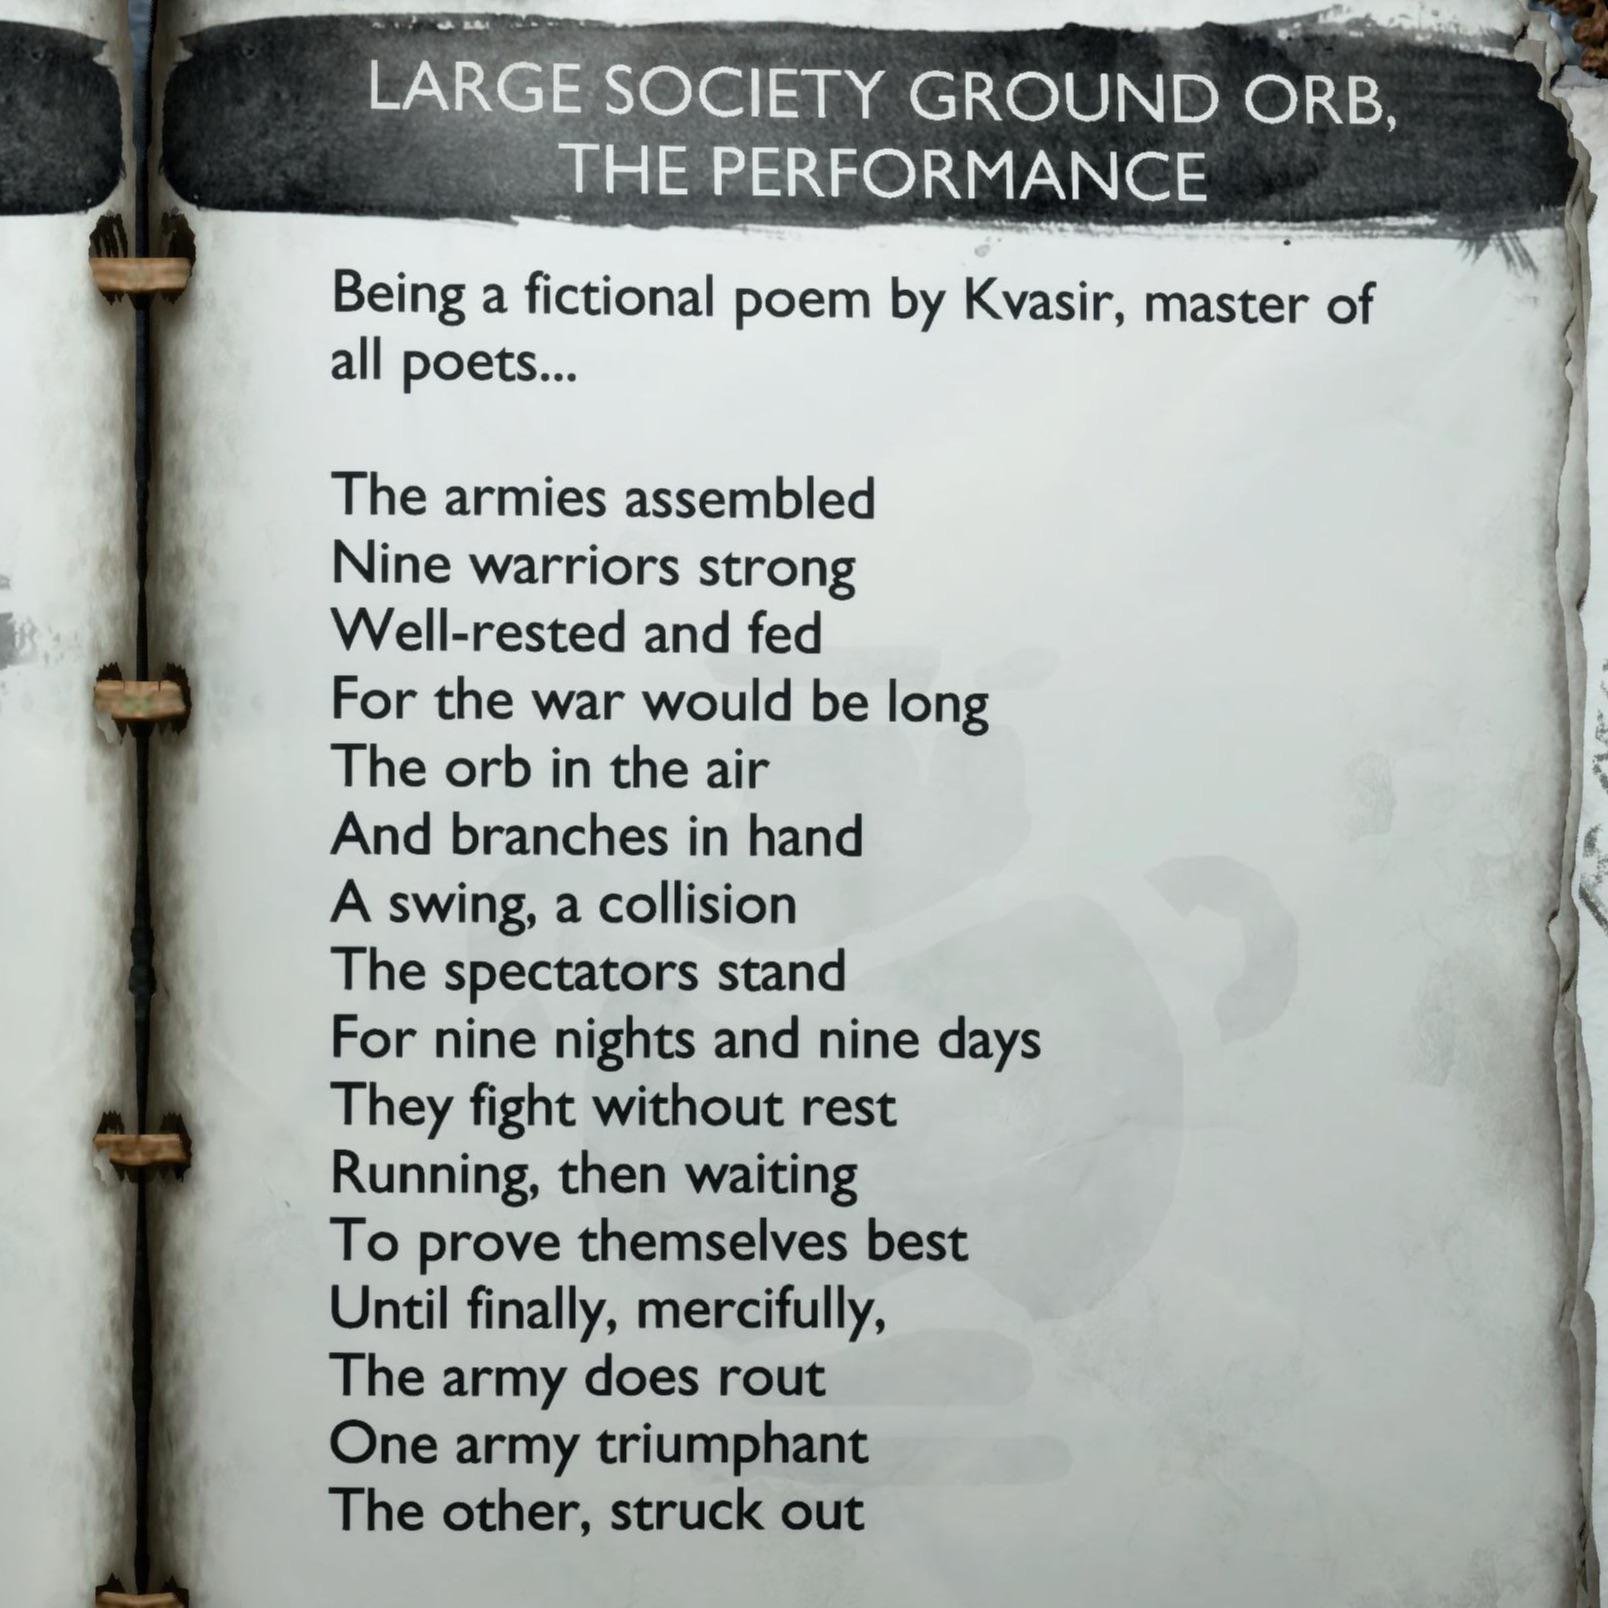
Protecting tone
One of my favorite quests that I worked on in Ragnarök was “Kvasir’s Poems.” This was a whimsical collectible set in which each collectible was a book of poetry that made humorous references to other PlayStation games like Ratchet and Clank, Death Stranding, and even MLB: The Show.
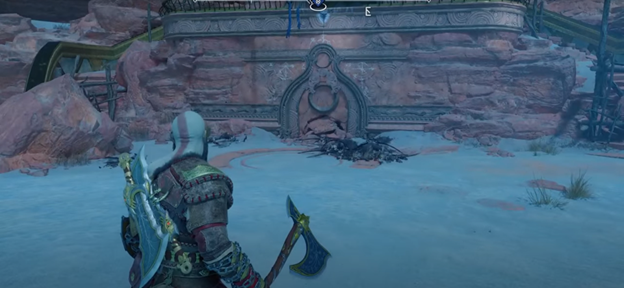
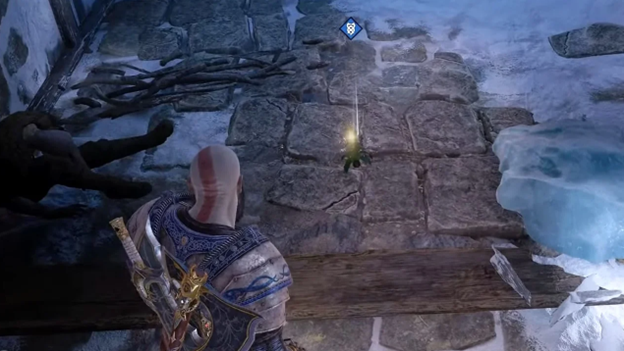
The goal with this quest was to support the playful vision for the collectible set while not undercutting the serious tone of Ragnarök as a whole. To make each book feel impactful, I worked with our amazing level design team to find spots for each book that reflected the themes or subject matter of the game it referenced. For example, the Ratchet and Clank book is next to a set of gears in Svartalfheim while the Journey book is initially covered in sand in the Alfheim desert.


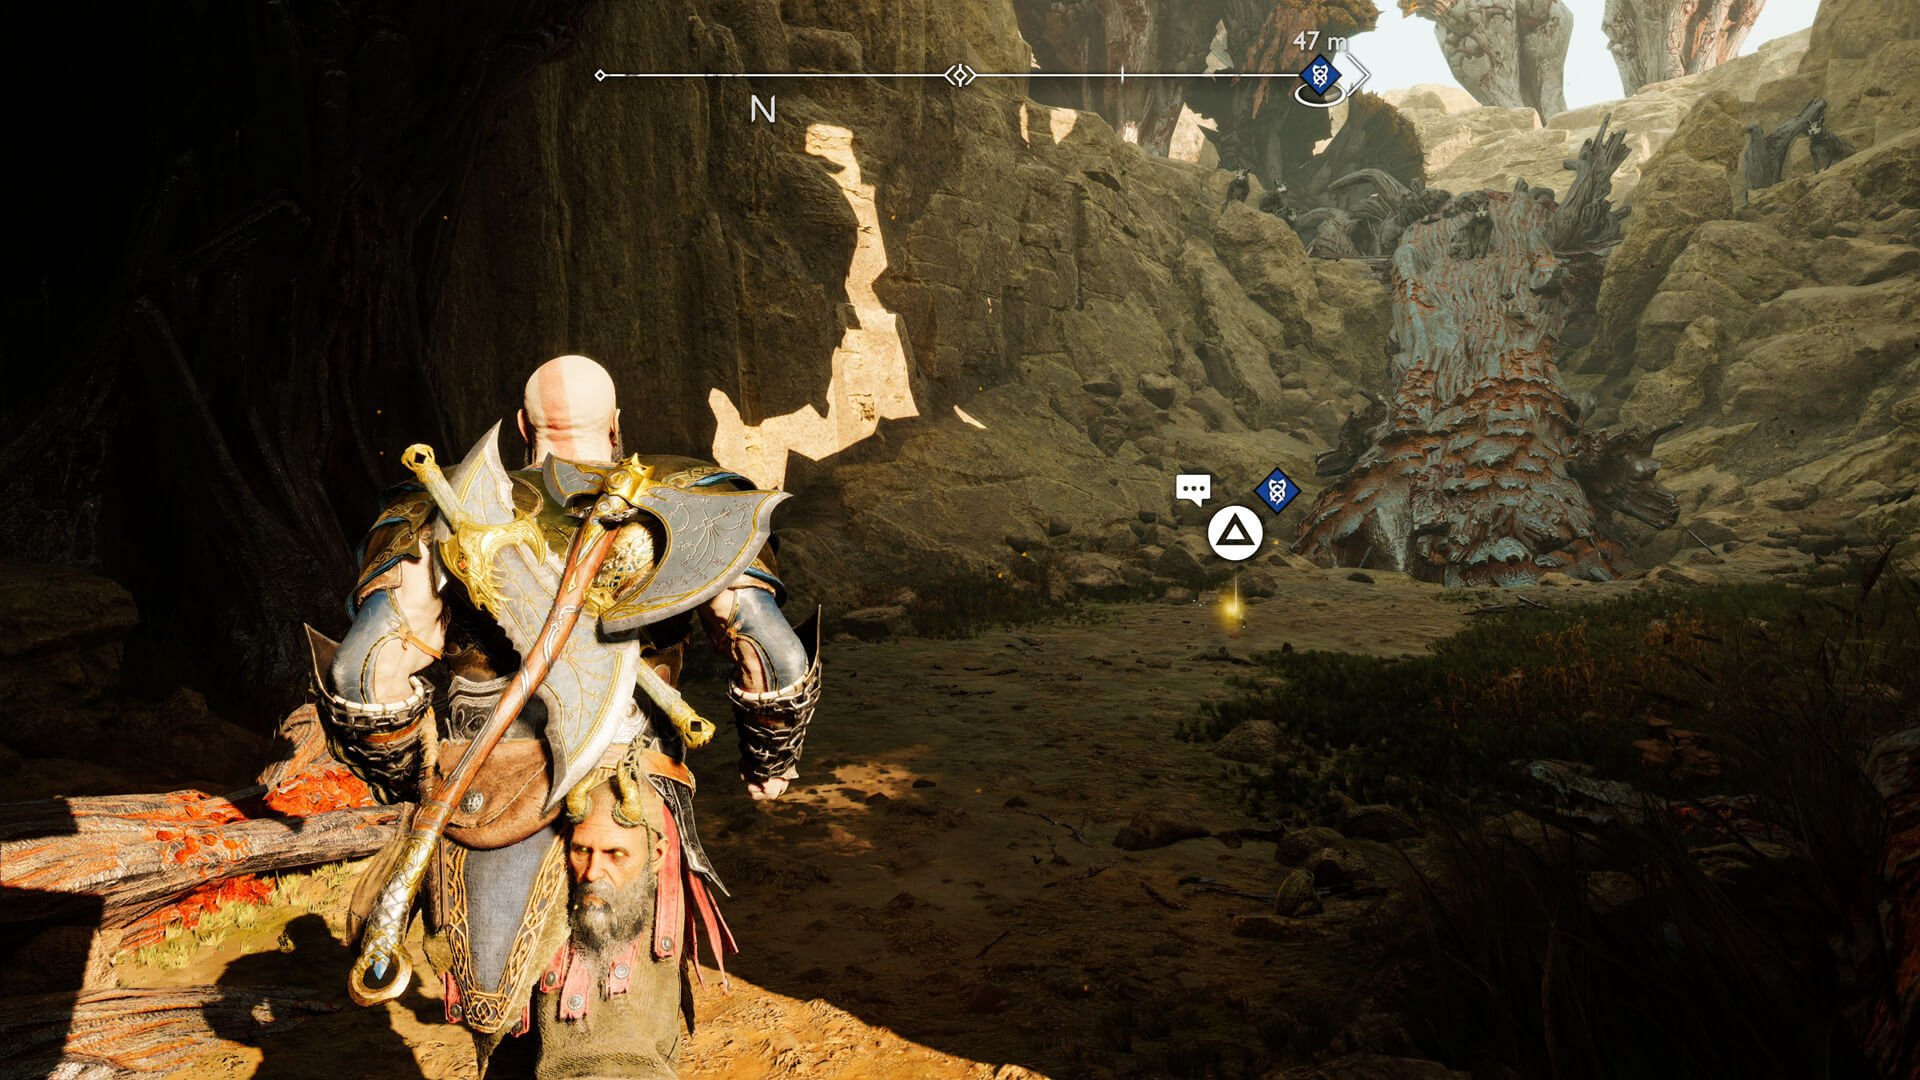
The issue with this approach is that sometimes the best spot for a particular collectible might be too close to a key piece of critical path dialogue or the dialogue of another major side quest. For example, the Major League Baseball book was initially supposed to be next to a bar in Nidavellir, the Dwarven capital, but was moved because it was too close to banter that would fire when Atreus and Kratos entered the city for the first time. To avoid these kinds of issues, I had to know the critical path banter and all side quest banter like the back of my hand. I also had to be aware when other side quest or critical path moments were moved or cut, because that could mean that my artifacts were now conflicting with other banter. Sometimes, these cuts would necessitate moves that created a domino-effect where many pieces of banter would need to find a new home. I think hand-programming this banter made it so our characters felt like they were actually reacting to the world around them as opposed to running through a pre-ordained script.
Sometimes there would not be a direct conflict between two bits of side quest content, but the resulting tonal mismatch would be unacceptable. For example, the Journey book of the Kvasir’s Poem collectible set was initially supposed to be near the basement of the Elven Sanctum, where Kratos and his companion would discover a grisly secret murder. The problem is that the Kvasir’s Poems artifacts could trigger humorous banter depending on what order the player picked them up. So while there was no direct banter overlap, putting that book in that spot caused the player to sometimes experience a very dark scene next to a humorous one. To protect the tone of the Elven Sanctum quest, we had to move the book, even though there was not a clear spot for it at the time.
Kratos finds a pile of Elven corpses outside the Elven Sanctum.
Much of the design work I did was this kind of design Sudoku. It was less about finding the best spot for a particular piece of content and more about making sure all the content sang in harmony. One of the mantras that Anthony DiMento, our team’s lead, would repeat to us is that even if 1 in 1000 players encountered a bug or banter conflict, that’s still 1,100 people that will experience it given our huge userbase. Attention to detail was paramount.
Working with narrative
Sometimes, there would be no good place to put a collectible or quest item. For example, one of the tasks I was given during Ragnarök was to place the nine flowers of the “Nine Realms in Bloom” artifact set. The idea behind this set was to put one flower collectible in each of the nine realms. The problem was that at that point in the project, there were no plans for Kratos to be able to freely revisit Jotunheim or Asgard.

The Svartalfheim flower.
We didn’t want to “wave away” this inconsistency by placing these two flowers in a random spot, so the writer Anthony Burch and I brainstormed how we could resolve this issue. We scoured the game for spots where these flowers could exist and the game’s lore for reasons those flowers could exist outside of their parent realm. (At all points in the project, I had several textbooks of Norse and Greek mythology on hand for this kind of research.)
After some research, we discovered two spots. As those who have beaten the game know, the game’s climax is the destruction of Asgard, which causes chunks of Asgard to fall into the other realms. Our initial inclination was to put the flower in one of these chunks (which make up the “The Last Remnants of Asgard” quest, another of my quests) but our flower model was quite dainty, so it didn’t make sense to us that the flower would fall hundreds of miles to the ground and still be intact.
We then moved our search to “The Broken Prison”, a prison of Asgard that had fallen into the Niflheim region. It made more sense to us that the flower could survive the fall if it fell within a huge building, but we still needed a justification as to why the flower was inside the prison. After looking through the prison, we saw that there was a corpse in an empty cell. We thought it would be poetic for this unnamed character to dedicate the last of his life to take care of this flower, so we placed the Asgard flower next to his corpse and wrote some dialogue that told that story.
The Asgard Flower. The corpse can be seen beside Kratos’s head.
The Jotunheim flower was trickier because Jotunheim was written to be an elusive place in the God of War universe. When I joined the project, Kratos and Freya (who serves as the player’s companion in the postgame) were never supposed to visit Jotunheim at all. When the game’s lore did not give a good reason to justify the flower growing in another realm, Anthony Burch and I began to investigate other characters related to Jotunheim. Of the few characters associated with Jotunheim, only Faye, Kratos’s deceased wife, found her way into other realms like Midgard and Vanaheim. After conferring with the narrative team, we decided to put the flower in Kratos’s and Atreus’s backyard.
The problem then was that there was lot of key banter around the house in the first half of the game, so we couldn’t put the flower there for fear of banter overlap. Eventually, we were able to solve this by having the dialogue reflect that Faye had planted the seed for the flower a long time ago but it did not have the chance to sprout until Ragnarök arrived at the end of the game. Ultimately, we decided not to go in this direction because it was decided that Kratos and Freya should be able to visit Jotunheim in the post-game, but I’m proud of the solution we found.
The Jotunheim flower was ultimately placed in the optional postgame Jotunheim area.
Nuts and Bolts
Towards the end of the project, I was assigned to help finish the work that had started on Ratatoskr and the game’s three dwarven shopkeepers (Brok, Sindri, and Lunda). This involved ensuring that these four characters could give Kratos their respective quests. I also had to ensure that these characters would react accordingly to the events of the main campaign and the specific side content that the player had embarked on. In many ways, this was the most complex task I was assigned because between these characters there were thousands of lines of dialogue, some of which had very specific requirements.
To give you an idea of how specific these requirements got, I had to program a specific line Ratatoskr would say if Brok had died recently, the player has gathered only one lindwyrm, and they had not yet started the “Stag for All Seasons” quest. Making sure these lines played at the correct time required me to know the game’s story and side quests intimately. I had to visualize all the different paths that the player could take before encountering these characters.

Ratatoskr, voiced by the awesome ProZD. Fun fact, I had watched a video by ProZD the day I got the call confirming that I had been hired to work on God of War: Ragnarök.
In addition to making sure that the correct line would play at the right time, I had to make sure that the character speaking the line would be playing the correct animation. For many of these conversations, I hand-programmed what or who each character would be looking at and, in some cases, programmed minor animations or gestures to play on the speaking character to add life to the conversation. Since there were hundreds of lines each with their own set of prerequisites and animations, this led to some odd bugs. For example, there was a point in production where Brok was mysteriously speaking lines of dialogue after he had passed away in the story. We found that this was happening because the banter system had found his resting corpse within the scene and was playing lines out of his rig’s mouth. Thankfully, most bugs were not so haunted.
After these more technical bugs were sorted, my attention turned to bugs that were more about narrative continuity. Since there were hundreds of lines each with varying levels of emotion and tone, part of my job was identifying where lines could combine (however unlikely) to create an experience that broke immersion. For example, Ratatoskr had several lines where he mourned the loss of Brok and also many lines full of innuendo. We couldn’t have those back-to-back. I poured over spreadsheets with Orion Walker, Ratatoskr’s writer, for hours to identify these tonal conflicts and rescript our dialogue system to avoid them. While it was hard work, I believe it led players to feel these characters had a level of interiority. I’m particularly proud that the YouTuber VideoGameDunkey ended his glowing video review of God of War: Ragnarok with some footage of Ratatoskr reacting to the player hitting the chime over and over.
Thank you for allowing me to share some of my process as a Systems and Quest Designer with you. All the work described above was a team effort between the studio’s many talented designers, producers, artists, writers, directors, and QA personnel. I’m proud of the work that our team did.
In the future, I may write more essays about what it means to be a Systems Designer in a AAA context and talk more about some of the other content I worked on in God of War: Ragnarök.
Book Review, Games, Programming
Game Dev Book Review: How Two Patterns from "Design Patterns" Can be Applied to Game Development
I am always trying to upgrade my software engineering skills so that I can design and produce more interesting games. Last month, I learned a tremendous amount from the seminal coding book Clean Code (which I covered in this blog post), so I thought I would next study Design Patterns: Elements of Reusable Object-Orientated Software, another software engineering classic.
I learned a huge amount from this book, so I wanted to share some interesting ideas from it. While many of the design patterns in the book have been discussed at length, not all of them have been discussed extensively in the context of game development. So, in this blog post, I will discuss how the Decorator and Bridge patterns can be used in game programming. My hope is that these examples will help readers recognize how these patterns can apply to their own projects. I’ll be using examples from popular games to illustrate these patterns, though I will be tweaking details to keep things simple.
Pattern: Decorator.
What it’s Generally Used For:
To add functionality to an object dynamically without changing the object itself. Decorators can “stack” onto each other, so you can add a theoretically infinite number of decorators to an object. In some cases, the order in which the decorator is applied to an object can create novel functionality.
One Potential Use in Games: Adding stackable attributes and behavior to in-game items.
Helpful Physical Metaphors: Russian Nesting Dolls, Onions.
Example: Borderlands and its procedurally generated weapons.
Games like Borderlands often boast that they effectively support an infinite number of unique weapons. In practice, these weapons are not totally unique but rather a set of base weapons (crossbows, shotguns, rocket launchers, etc.) that can be modified ad infinitum via a set of shared stats (reload rate, fire-damage, ice-damage, fire rate, etc.)

Some of the traits of weapons in Borderlands 3. The weapon stats on the left column here best fit our discussion of the Decorator pattern. Borderlands Cheat Sheet from Rock Paper Shotgun. Click on the image to see the original article.
It is impractical for the game’s developers to create a combination of each base Weapon and set of stats, so they might use the Decorator pattern. What the decorator pattern allows the programmer to do is “wrap” a base object with additional functionality, like how a Russian nesting doll can be wrapped by another Russian nesting doll. When a Client (a program that sends a request to another program) needs some information from this nesting doll-like structure, it gets information from the outermost doll then moves onto the next smallest doll until it reaches the very smallest doll. When it reaches this base doll, it will return all the data it collected along the way to the Client.

One gun from Borderlands. Click on the image to see the Rock Paper Shotgun article where it came from.
For example, let’s say that in the new Borderlands there is a Shotgun, Rocket Launcher, and Crossbow that all inherit from the Weapon superclass. All Weapons share some basic stats (reload speed, fire-rate, damage, etc.) In our example, Player A finds a Fire Upgrade that adds Fire damage to a Shotgun in their inventory. If the Shotgun was programmed using the decorator pattern, this Fire Damage upgrade could be wrapped around the Shotgun base object.
A key point here is that the Shotgun class and the FireDamageUpgrade decorator inherit from the same Weapon superclass, so when a Client encounters the Fire Damage Decorator wrapped around the Shotgun (the client cannot access the Shotgun directly because the decorator is around it), it still treats the Decorator as a Weapon.
To use an onion metaphor, we do not consider a layer of an onion by itself to be a full onion, but we do treat a layer of onion on top of other layers to be an onion. A FireDamageUpgrade decorator by itself cannot function as a Weapon class, but when it is wrapped around a Shotgun class it is treated as a Weapon.
The strength of this pattern is its flexibility. In the Borderlands example above, the Decorator pattern allows me to:
Remove decorators I do not want (I can reverse the Fire Damage upgrade).
Easily add new functionality (I can add a Fire Damage upgrade on top of another Fire Damage upgrade.)
Create unique functionality through the order the decorators are wrapped (I can put a DamageMultiplier decorator that multiplies the effects of previous decorators.)
Implementation:
Pattern: Bridge Pattern.
What it’s Generally Used For: Allows two superclasses to evolve independently of each other yet still work together.
One Potential Use in Games: Matching AI personalities with NPC bodies that can express those personalities.
Helpful Physical Metaphor: Royal families and their subjects.
Example: Companions and their Fighting Styles in The Outer Worlds.
The Bridge pattern is very abstract, so I will first describe it in metaphorical terms.
Imagine there is a Royal family that rules over a group of Servants. The Servants are bound by an Oath that says they will Feed, Protect, and Entertain any member of the Royal family. Any Royal can call on any Servant to fulfill any part of the Oath. For example, a Royal King can call on any Servant Knight or Farmer to Entertain him.
What makes things interesting is that every servant has their own definition of fulfilling each part of the Oath. A Knight might Entertain a Royal by juggling swords, while a Farmer might Entertain a Royal by telling fables. A Jester might feed a Royal princess by gathering apples for her, while a Knight will feed the Princess by hunting a boar for her. The society functions (in its oppressive feudal way) like clockwork because every Servant can fulfill every part of the Oath and the Royals only command the Servants through the Oath.
A UML diagram of this Royal / Servant society. Click on this image to see this diagram in more detail.
With this structure, Royals can ask for elaborate combinations of the Oath’s parts. A King, for example, can DemandFeast(), which can consist of four DemandEntertainmant() calls and 2 DemandFood() calls. A Prince can DemandCircus(), which comprises four DemandEntertainment() calls. Since every Servant can Entertain and Feed, the King’s Feast command can be carried out by any Servant.
The advantage of this structure is that as long as the Royals only ask for what is in the Oath and every Servant continues to fulfill the Oath, new Servants and Royals can enter the society without changing the behavior of existing Servants or Royals. For example, a new Servant Chef can join the society who Protects() by swinging a wooden spoon, Feeds() by cooking turkey, and Entertains() with parlor tricks. Since the Chef can Protect, Feed, and Entertain, he can serve any Royal. The Oath, in this metaphor, is the Bridge between the Royal superclass and the Servant superclass.
Imagine that the same society wanted to function without an Oath between Royals and Servants. Whenever a Royal asked a Servant to do something, they would need to check whether the Servant was capable of performing that task. If there were twenty Servants and twenty Royals, there would be 400 possible interactions between the groups to account for. That is a lot of room for error!
So how can this pattern be applied to game development?
One unconventional way the Bridge pattern could be used in Game Development is assigning Fighting Styles (AKA personalities) to Companion NPCs.
A Companion fighting an enemy in The Outer Worlds.
In The Outer Worlds, a sci-fi action-RPG, you spend a significant portion of the game with Companions that fight enemies alongside you. At any point in the game, you can ask this Companion to change their Fighting Style to either Aggressive, Defensive, or Passive. The Companions will use their loadout and unique combat ability to fulfill the Fighting Style you have chosen for them. So if you ask Parvati, the mechanic Companion, to act Aggressively, she will Shoot, Charge, and use her combat ability “Overload” to do so.
The stat sheet of Parvati, the first Companion most players will encounter.
For sake of simplicity, we’ll assume that all of the companions share a set of combat “primitives”, like Hide, Shoot, Charge, Heal, etc. A “Shoot” primitive may look different for every companion, but every companion is capable of fulfilling the “Shoot” request. Fighting Styles call on combinations of the primitives to create a semblance of a personality. A Passive fighting style might consist of mostly Healing and Hiding, while an Aggressive fighting style might consist of mostly Charging and Shooting.
The six Companions in Outer Worlds.
There are only six Companions and Three Fighting Styles in The Outer Worlds, so there are only eighteen possible combinations of Companions and Fighting Styles. It’s possible that Obsidian hard-coded each permutation of Fighting-Style and Companion (Aggressive-Parvati, Passive-Nyoka, Passive-Vicar Max, Defensive-Parvati, etc.) but they also may have used the Bridge pattern.
(In this context, the Fighting Style would be our Royal / Abstraction and the Companion would be our Servant / Implementer [Abstraction and Implementer being the formal names for those parts of the pattern.])
There would be many advantages to using the Bridge pattern in this situation. Let’s say Obsidian, the developer of Outer Worlds, wanted to add Morty from Rick and Morty as a Companion in a new DLC. If Morty inherited from the Companion subclass, Obsidian would not need to program an Aggressive-Morty, Passive-Morty, and Defensive-Morty. As long as Morty inherited from the Companion superclass, those permutations of Morty would automatically be available.
Aggressive-Morty.
The same would be true if Obsidian wanted to add a new Fighting Style. As long as the Fighting Style relied upon the Companion superclass’s methods, Obsidian would not need to create a new version of every Companion with that fighting style.
It’s important to note that just because any Companion can do something doesn’t mean that they do it well. For example, Obsidian could decide that when the Morty companion receives a command to Heal(), he cries and heals himself 0 points. While this may not be the best design, it is technically sound. Morty is fulfilling the Heal command - it’s just that his implementation of Heal doesn’t actually involve healing. The Bridge pattern ensures that Companions carries out requests from the Fighting Style. It doesn’t ensure that any Companion fulfills that request in a particular way.
A UML diagram of how Outer Worlds could implement the Bridge pattern. Click on this image to see this diagram in more detail.
Since the Bridge pattern allows Companions to create their own definition of fulfilling the Fighting Style’s requests, Obsidian has significant room to make creative choices. If they wanted to be very experimental, they could create a comically rebellious Companion that does the opposite of whatever you tell them to do. This character would Heal when you ask them to be Aggressive and Charge when you ask them to be Passive. To create a character like this, Obsidian would need to define Heal() as attacking and Shoot() as healing. This Rebel companion would still fulfill the Fighting Styles requests - they would Heal() when asked to Heal(). But like Morty, their version of Heal() would not include Healing. This is admittedly a silly example, but I think it underlines that Companions define how they execute the Fighting Style’s commands.
The Bridge pattern has other drawbacks as well. There’s a chance that a Fighting Style and a Companion may combine to create strange behavior. For example, imagine each of our companions has an Energy stat that they need to draw from to perform actions. The Morty Companion has 10 Energy by default and spends 3 energy to Shoot. If the Aggressive Fighting Style requires its Companion (Morty) to Shoot 4 times (requiring 12 energy) Morty cannot fulfill the Aggressive Fighting Style unless we consider his inability to Shoot a fourth time a successful execution of the Shoot command. When Companions manipulate variables that are outside the Bridge pattern as Morty did, there can be room for error.
This pattern doesn’t make sense in all cases. If each Companion in The Outer Worlds had a distinct, unchanging personality in combat, another pattern might be more appropriate. But since it has one superclass that relies heavily on another, a Bridge might be useful.
The Bridge Pattern has many strengths:
I can add, modify, or delete any Fighting Style or Companion without breaking anything.
I don’t have to handcraft an object that represents every combination of a Companion and an Fighting Style.
I can pair or unpair any Fighting Style and Companion during runtime.
Implementation Details:
Thanks for reading! If there are any other programming books that you recommend, please comment below!
Welcome to my game development Blog!
Thank you for checking out my blog!
In this blog, I discuss game design and programming, two of my favorite topics. I also write about updates to my recent game development projects. By writing about design and programming, I hope to increase my own understanding and share what I have learned with readers.
I have organized the blog into several themes. Click on a theme to see blog posts that cover that topic.
I also have blog posts specific to my current and past projects. Click on a project’s name to view posts about it.
If you find these topics interesting, I’d love to hear more from you! Let’s start a conversation.
- Brett

New Gameplay Videos from CineMoiWorld: Quest and NPC Design
CineMoiWorld, a project that I was a Narrative and Systems Designer on, was recently published in the Samsung Store, so I can finally share some videos of the project’s gameplay that I designed and wrote! I have also included a link to the project’s opening animation, which I wrote and directed. The two gameplay videos also include some developer commentary from me. Check it out below!
Quest Playthrough with Commentary
NPC SYSTEM PLAYTHROUGH WITH COMMENTARY
OPENING ANIMATION THAT I WROTE AND DIRECTED:
Game Dev Book Review: 6 Interesting Ideas from "Clean Code" by Robert C. Martin

Several software projects I worked on recently came to an end or a milestone, so I have been reflecting on how those projects could have been made better. Although I’m proud of these projects, I noticed that these projects were actually harder to program towards the end than the beginning. So, I have been studying how to create code that is easier to read, maintain, and scale:
I’ve studied the SOLID principles, which I wrote about in this blog post.
I also read Clean Code by Robert C. Martin, one of the seminal books on code organization. I learned a lot from this book, so I thought I would share six eye-opening ideas and metaphors from it:
1. Your code should be organized like a newspaper.
Most newspapers go from the general to the specific - a headline will tell you the big picture, then a series of subheadings and paragraphs will fill you in on the minutia. You code should mirror this structure: it should start abstract then get progressively more specific.
Code written this way might look like this:

Why this structure?
Firstly, code written this way is more readable. Instead of jumping between high-level and low-level details, the reader is eased into the specifics of the code.
More importantly, this structure avoids duplication: my IncreaseBranches code is only in one place, so if something is wrong with the number of Branches in a Tree, I know exactly where to look.
2. Code should be “shy.”
Throughout the book, Martin personifies his code in instructive ways. One way he does this is by saying that code should be, “shy.” What he means by this is that a class should only talk with its immediate collaborators.
Here is an example of overly extroverted code from a tower defense game:

This code has many issues, but the biggest is that LoseArea is using UIManager to talk to PlayerBaseHealth. The problem with this setup is that if UIManager needs to change, the link between LoseArea and myPlayerBaseHealth will break, causing errors. Using UIManager as an intermediary also makes this code more complex and harder to debug.
Shy code only talks to the classes it needs to, so we cut out the middleman and avoid issues like this.
3. Eliminate functions with Boolean parameters if they contain two different sets of functionality.
When writing code, we want our classes and functions to do one thing. (I go more into this principle in the Single-Responsibility section of this post.) When we create a function with a bool parameter, we invite the possibility of creating a function that does two things.
Let’s say we have a Soldier class that we need to make either Ice or Fire Damage resistant.
We could write the code poorly like this:

There’s a lot wrong with this function, but the biggest issue is that this function is two functions in one. This is problematic because it adds ambiguity to our code. If we’re not familiar with this function, we are forced to ask ourselves whether “TRUE” maps to gaining Fire OR Ice resistance.
Additionally, Fire or Ice Resistance is a false dichotomy. Let’s say our producer wants us to add poison damage to the game. If we want to use this function to give the soldier Poison resistance, we will need to rewrite it.
It’s better to split out the functionality into more specific functions:

The functions’ responsibilities are now clear from their names.
4. Code should not be “envious”.
An envious class heavily manipulates the variables and functions of another class.
In the example below, our Farmer is too involved in the inner machinations of Tree – Farmer is envious of Tree’s functions and variables.

If a class is manipulating variables that don’t concern its primary functionality, it’s probably envious.
Why don’t we want envious classes?
As with many of the principles above, envious classes make our code both harder to debug and more error prone. Let’s say our Trees contain less Fruits than we expect. Our first instinct might be to search Tree – but the functionality that makes the fruits null (which is problematic for other reasons) is not there. It’s in Farmer.
Putting HarvestFruitTree in Farmer also invites duplication or coupling. If a lazy programmer wants another class to Harvest Fruit, they might have a class:
· Make its own implementation of HarvestFruitTree, creating duplicate code.
· Call HarvestFruitTree through Farmer, coupling the classes together.
We would fix the example above by moving the HarvestFruitTree function into the Tree class or one of its subclasses.
5. Your code should be a staircase of increasingly specific functions.
As you go from high-level to low-level functionality in your code, you should encapsulate each step in a well-named function.
In the FruitTree class below, we get a detailed description of how the tree grows by following the calls made by GrowOverall():

GrowOverall()
GrowRoots()
GrowBranches()
IncreaseNumberOfBranches()
GrowFruitsOnBranches()
GrowTrunk()
Viewed this way, you can see that our code steps down from the abstract to the specific.
This pattern of organization is ideal because it makes our code more modular. If we wanted our tree to grow only its roots for some reason, we could call GrowRoots instead of searching GrowOverall for this functionality.
6. The principle of least surprise.
Martin notes that impressive code is not necessarily code that completes some opaque, complex task but rather code that acts exactly as you would expect it to. In introducing this principle, Martin quotes Benjamin Franklin:
“A place for everything and everything in its place.”
Here is a screenshot of a Warrior class that does NOT adhere to this principle. You’ll see in my comments where it could be improved.

Final Notes:
Clean Code was an amazing book and it made me a better programmer. I would recommend it to anyone who’s interested in making their code easier to maintain and scale. It is quite Java heavy, so you will get most out of the book if you know Java.
Certificates, Games, Programming
I Completed a Course on SOLID Principles!
I completed a short course on SOLID principles!

If you’re not familiar with the SOLID principles, they are a set of principles that software engineers use to futureproof their code. They don’t necessarily make writing your code the first time easier, but they do make all subsequent modifications easier and less bug-prone.
Robert Nystrom, in his book Game Programming Patterns, states that your codebase should be like a calm pond - it shouldn’t ripple when you touch it. The SOLID principles are in pursuit of this same goal: to minimize the bugs and rewriting that occurs when new features or modifications are made to an existing codebase.
Here are the five principles with a brief explanation of each:
Single Responsibility Principle: every software component should have only one purpose and/or one reason to change.
Why? Let’s say we to want to create a game in which a Farmer class Digs up Vegetable objects (capitalization used here to designate classes and methods). We also want to create a Scavenger class that can Dig up wild Vegetables.
The incorrect approach would be to forego writing a Shovel class and instead write our Farmer and Scavenger classes so that they have the ability to Dig inherently. Our Farmer and Scavenger classes are now responsible for everything that Farmers and Scavengers do respectively plus Digging, so we are in violation of the principle.
But what if we have to change how Digging works in our game? In that case, we now need to change the Dig function in both our Farmer and Scavenger classes. Because we’re changing two classes instead of one, there is more work for us to do and we’re more likely to leave bugs in our wake.
If we were following the SRP, we would instead have separate Farmer, Scavenger, Shovel, and Vegetable classes; our Farmer and Scavenger classes would call on the Shovel class to Dig Vegetables. With this approach, if we need to update our Digging, we only need to update our Shovel class.
Open-Closed Principle: You should be able to add features to your codebase without modifying existing code.
One basic way you can follow this principle is by using generic classes that you believe will encapsulate objects that will be added to your game later on. To continue our Farming game example above, let’s say you want your Farmer class to run an ExtractSeed function on Blueberry objects, but you expect that you will probably want the Farmer to run ExtractSeed on other fruits in the future.
Instead of setting the parameter of ExtractSeeds to Blueberry {ExtractSeeds(BlueBerry incomingBlueBerry)}, you can instead set the parameter to Fruit {ExtractSeeds(Fruit incomingFruit)}. This way, you can have the Farmer run ExtractSeeds on Watermelons, Strawberries, and Kiwis without having to update the ExtractSeeds method.
Liskov Substitution Principle:
You should be able to replace any class with any of its subtypes without breaking your codebase.
In plain English, this means all objects called Fruits should be Fruits, all things called Animals should be Animals, etc.
Why? Imagine our Farmer class has an ExtractSeeds method that takes in a Fruit class and returns Seeds. (All Fruits have seeds of some kind.) If Rhubarb is mistakenly labeled as a Fruit due to its sweet flavor, the game will break when the Farmer runs ExtractSeeds on the seedless Rhubarb.
Interface Segregation Principle:
Interfaces are like Scout Badges; they signify that someone has a specific skillset. For example, if a class implements a IFlier interface, you can assume that it can Fly.
The Interface Segregation Principle basically says that interfaces should be narrow enough that they only cover one set of tightly related functionality. So an IFlier interface should not also contain functions that relate to combat. The reason for segregating interfaces is straightforward: if we put Combat-related functions in our IFlier interface, we might end up with a Hummingbird class that has a Slash function, which is not appropriate.
Many languages allow classes to implement multiple interfaces, so you could have an Eagle class that implements both your ICombatant and IFlier interfaces.
Dependency Inversion Principle:
The Dependency Inversion Principle is perhaps the most complex of the SOLID principles. It contains several subprinciples and concepts, which I will explain below:
The first concept to understand is high-level vs low-level functionality. High-level functionality is functionality that is “close” to an Input or Output device. In a game development context, this could be menus that are shown to the player or inputs taken in from the player’s controller. Low-level functionality is functionality that is “far’ from an I/O device. This would include pulling data from databases and running operations on local player data.
The second, more complex subprinciple of the DIP is that you want your high-level classes to depend on interfaces rather than specific instances of classes.
As mentioned in the Interface Segregation Principle section, an interface is like a Scout Badge: it signifies a particular set of functionality. If a class implements an interface, it is given that interface’s methods.
For example, if an NPC class implements an ITrader interface, then it will have the ability to perform Trade functionality in addition to all the other things that an NPC can do.
Let’s continue with the Scout Badge metaphor to explain the concept of Dependency Injection, which is the third concept wrapped up within DIP. Let’s say that a Cantina class needs a Camper class with a Culinary interface to work in the Cantina’s kitchen. Dependency Injection is the practice of that Cantina asking at Awake() or within its constructor for a Camper with an ICulinary interface as opposed to a specific Camper with an ICulinary interface.
It’s the difference between, “Get me Seth, who knows how to cook” VS “Get me somebody who knows how to cook.”
Why does this matter?
With this structure, the Cantina does not need to rewrite its code extensively for it to change the Camper with an ICulinary interface that it will be using. In other words, the Cantina’s kitchen keeps running even when Seth is out sick.
Here is that same example written out in code:
public class Cantina : MonoBehavior {public CantinaSettings myCantinaSettings;
private ICulinaryTrained myCulinaryTrained;
void Awake() {
myCulinaryTrained = myCantinaSettings.camperWithCulinaryTraining;
}
}
public class JuniorCamper : ICulinaryTrained {
@Overriding the CookFood method from ICulinaryTrained.public void CookFood () {
MakeSmores();
}
…
}
public class SeniorCamper : ICulinaryTrained {
@Overriding the CookFood method from ICulinaryTrained.public void CookFood () {
MakeBeans();
}
…
}
Given how we wrote the three classes above, the Cantina can freely switch between types of campers with Culinary training without rewriting almost any code. You’ll notice that SeniorCamper and JuniorCamper have different overrides of the CookFood method from ICulinaryTrained. What this means is the Cantina can choose between the two kinds of campers and their respective interpretations of food while ensuring it is getting some kind of food.
I love hearing new perspectives on these topics, so please leave some comments below!
Jukebox Beatdown, Games, Design
Jukebox Beatdown: Final Release and Gameplay Video
After several months of work, I am excited to announce I am releasing the final build and gameplay video for Jukebox Beatdown, my VR rhythm-combat game!
New Features in this build Include:
A ranking system that gives you a grade based on your accuracy, speed, health, and ability to stay on-beat.
A new fourth phase in the Funky Franny battle. During the saxophone solo, Franny will now unleash slash attacks upon the player.
A new interactive tutorial that tests the player’s understanding of core mechanics.
Visual overhaul of Funky Franny’s attacks
A “Lose” Screen that shows how close you are to beating Funky Franny.
A rework of the game’s sound effects.
Reworked the third phase of the Funky Franny fight to make it easier.
To see all these new features in action, check out the new playthrough video below:

Thank you to everyone who supported the development of this game, especially our team and playtesters!
Credits:
Game By: Brett Moody
Music By: Benjamin Young
Vern-Omega Voice By: TinyMike
I am now a Unity Certified Programmer!

I’m happy to announce that after passing the Unity Certified Programmer exam last week, I am now officially a Unity Certified Programmer!
The Certification is aimed at mid-level developers, so it is a good benchmark of my growth as a game developer and a nice affirmation of the studying I have been doing; I was able to pass the test with a comfortable margin of about 10% points.
The exam covered a wide range of Unity and game development topics, but largely breaks down into these sections:
Programming core interactions
Working in the art pipeline
Developing application systems
Programming for scene and environment design
Optimization of performance and platforms
Working in software development teams
Anecdotally, I can also say that the certification has a large emphasis on Unity Services.
I’ve been working in unity for several years, so it is rewarding to hit this milestone! I’m excited to continue to learn about Unity as I continue my growth as a game designer and programmer.
I Created a Spec Level and Game Design Document for Ratchet and Clank!
As a creative exercise, I recently designed a level and wrote a Game Design Document for Ratchet and Clank (2016).
Below are some sample images from my Level Design Document.

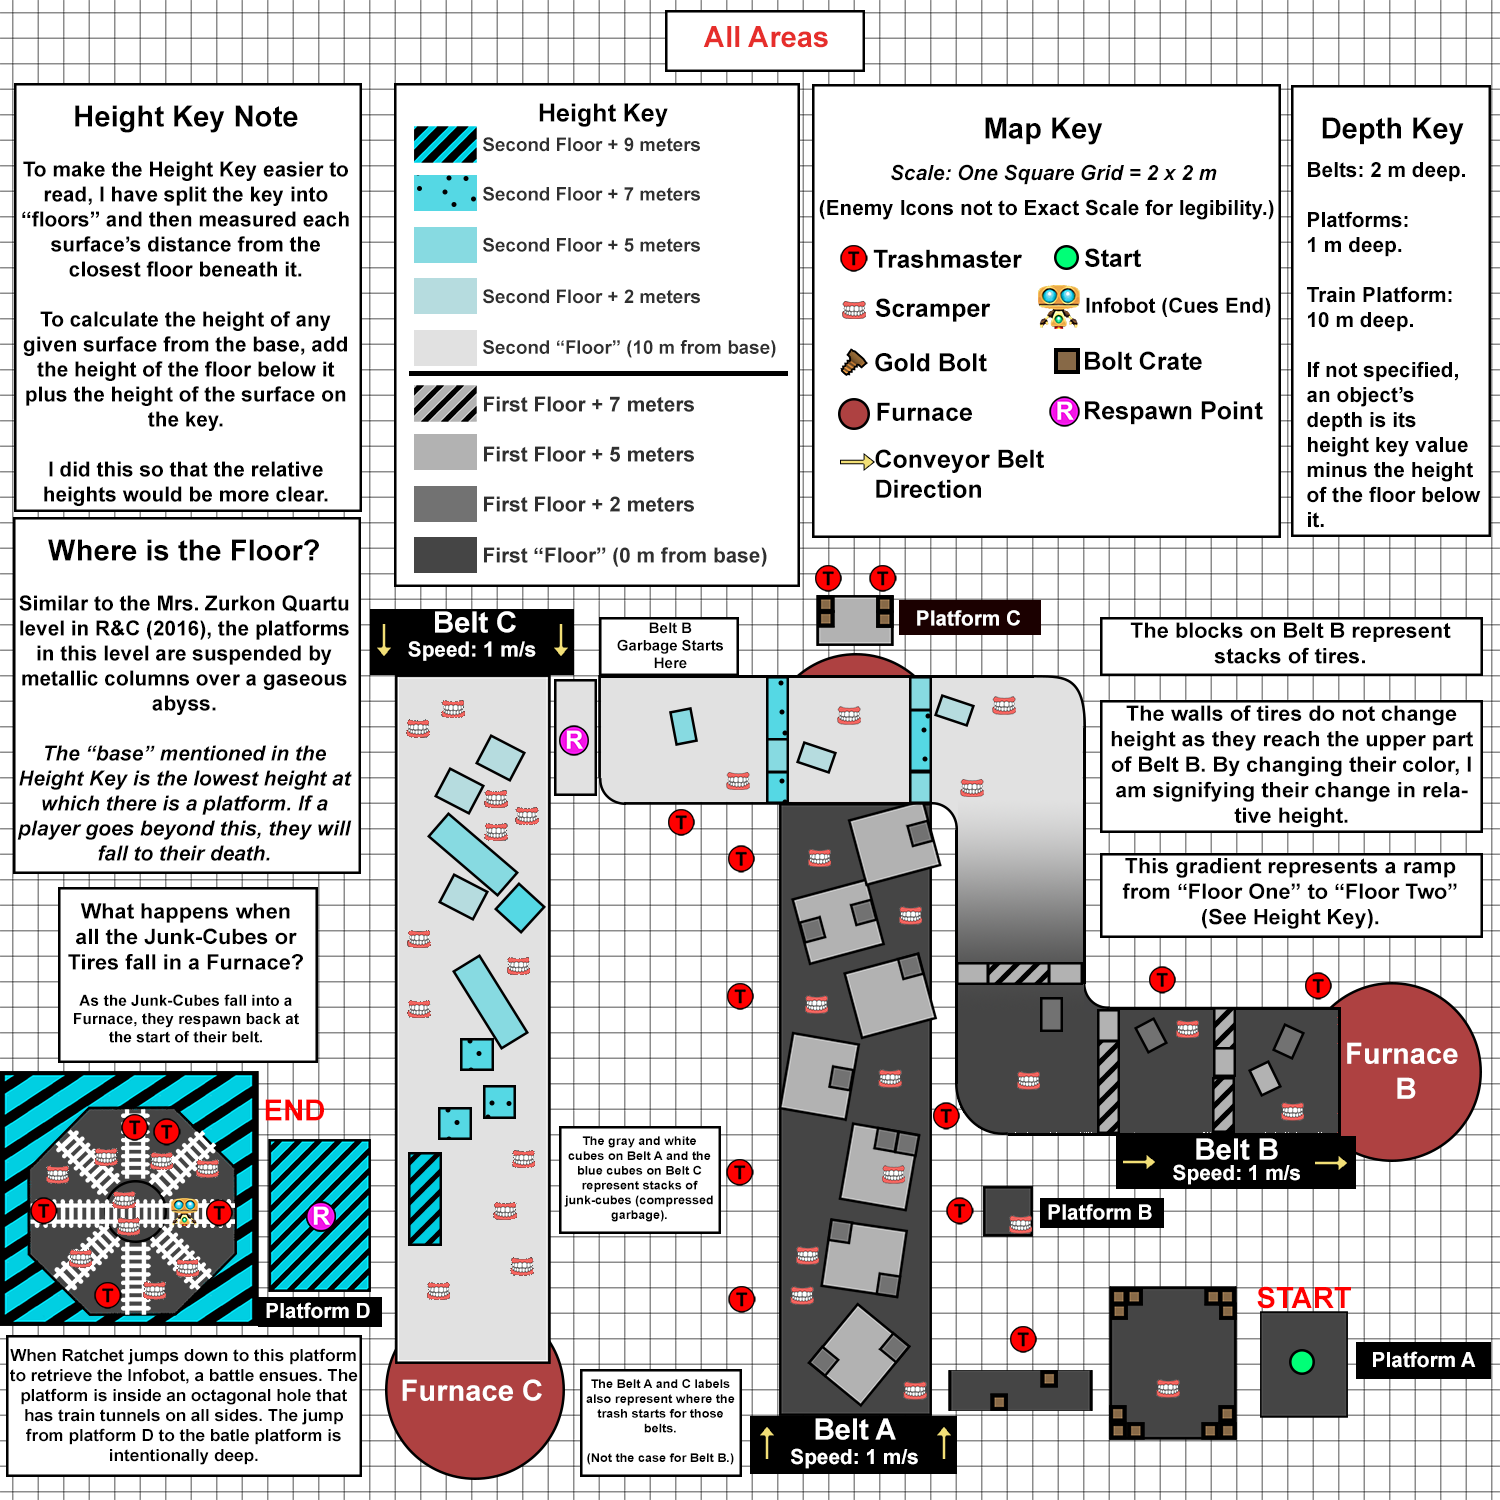
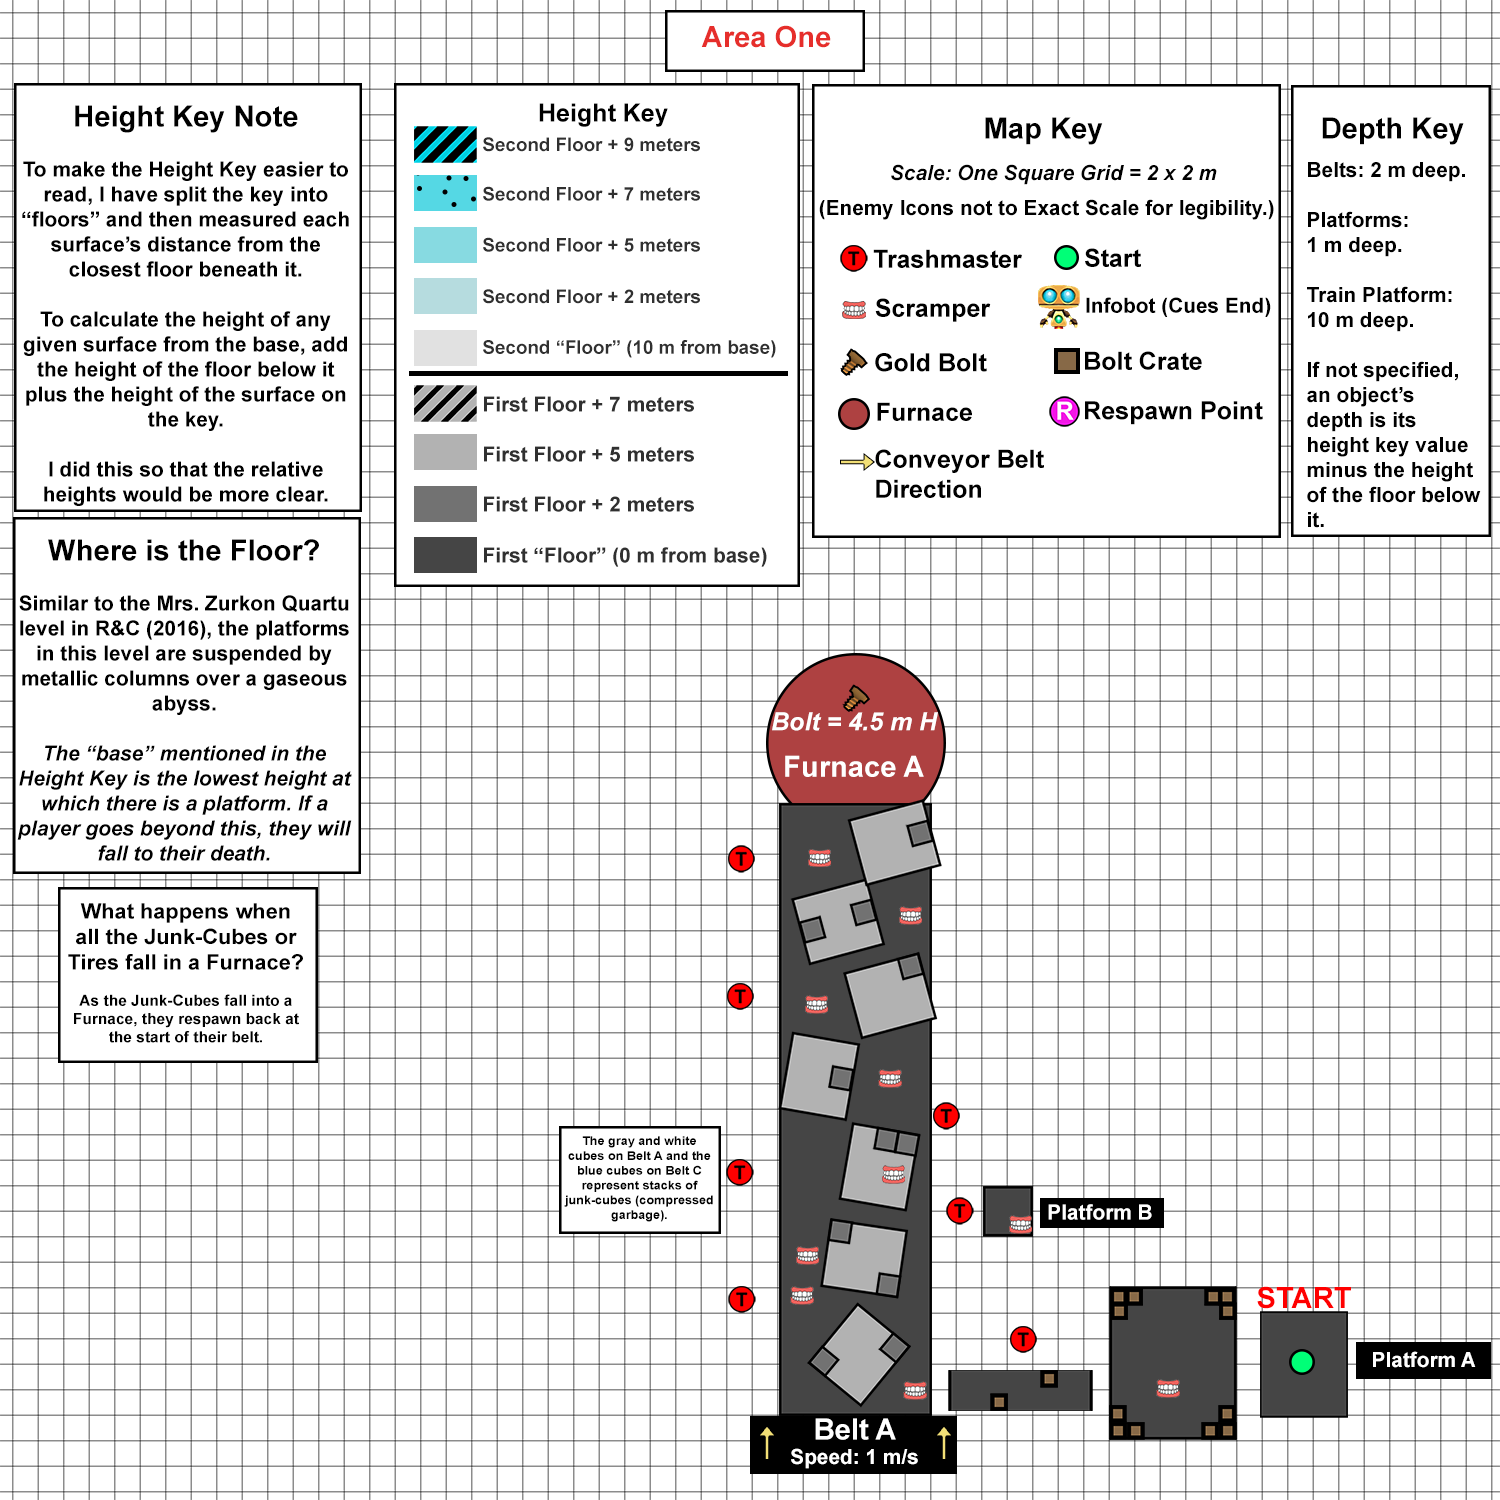
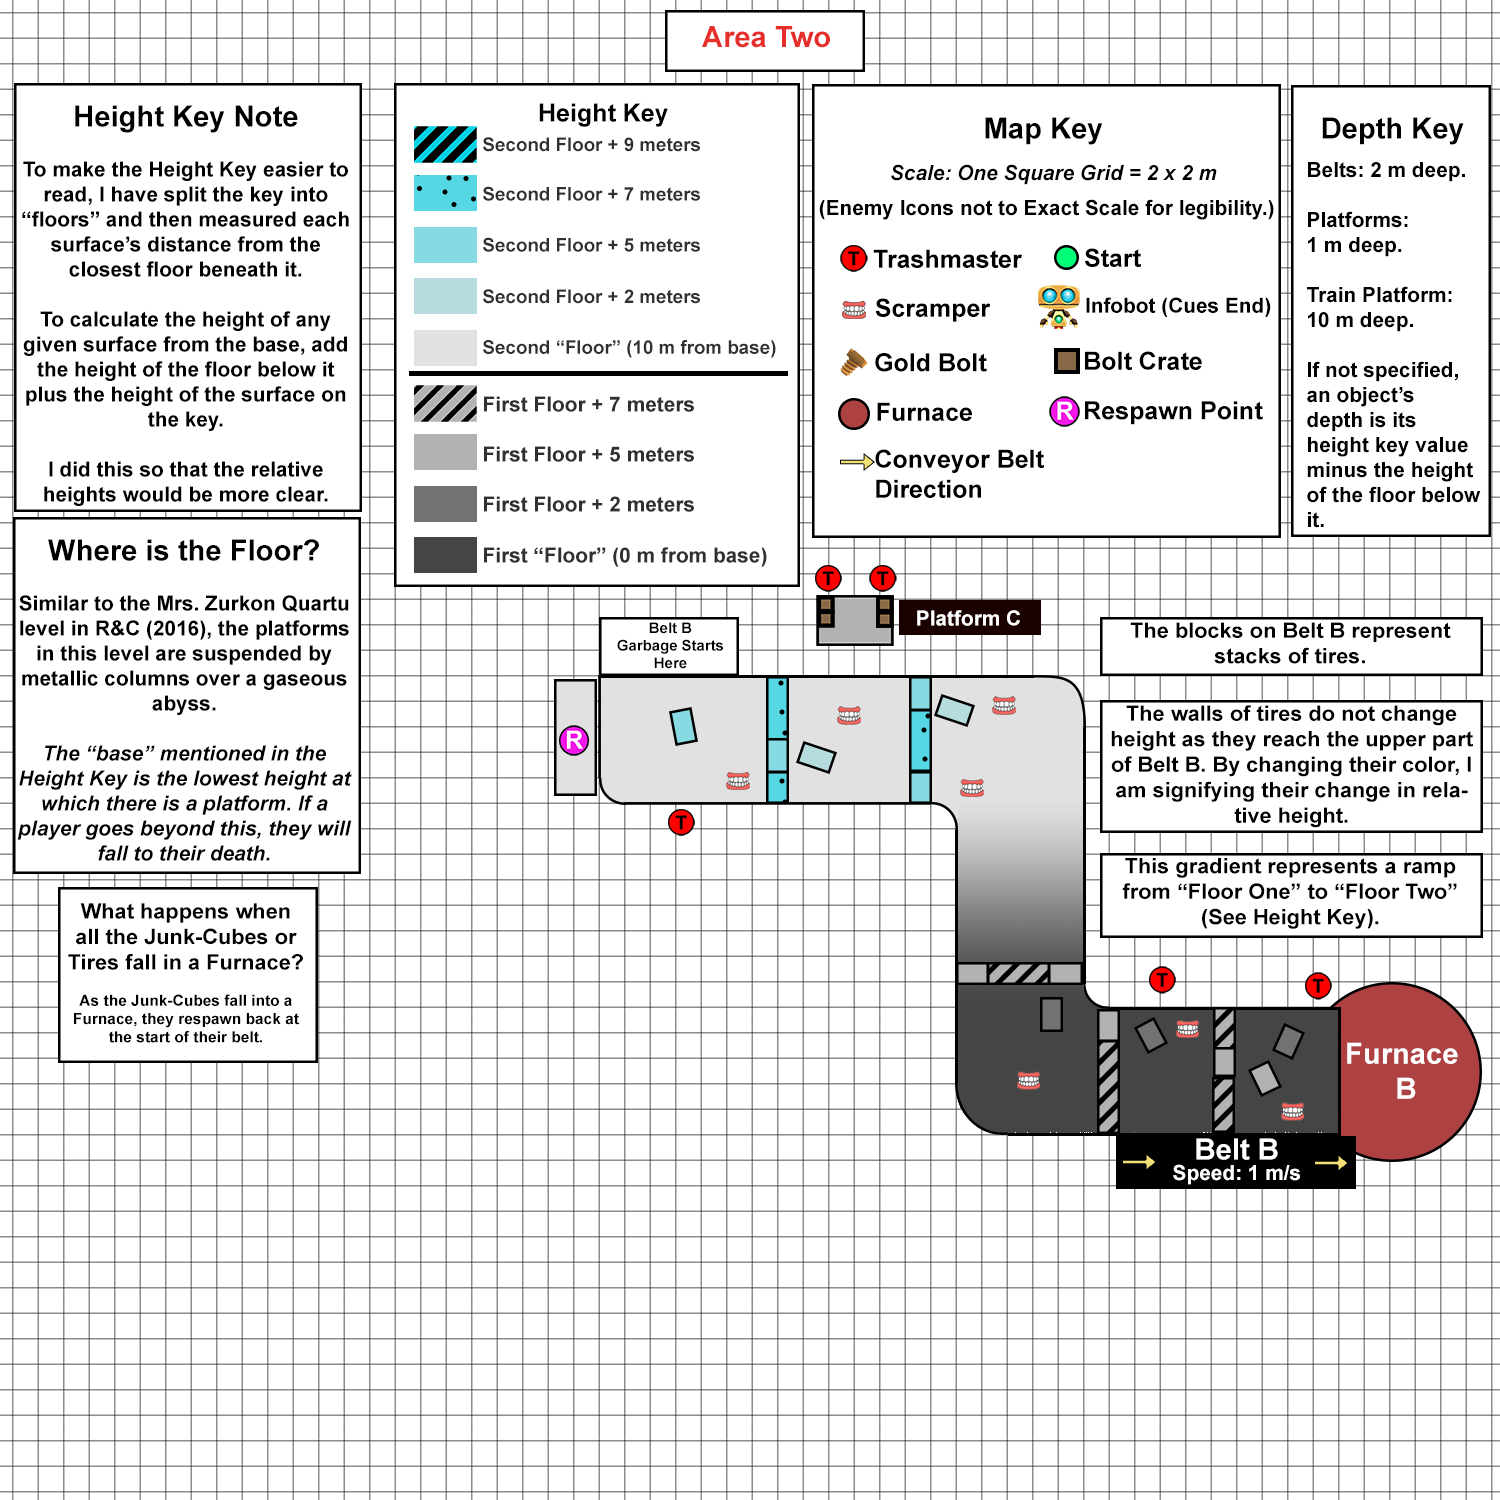
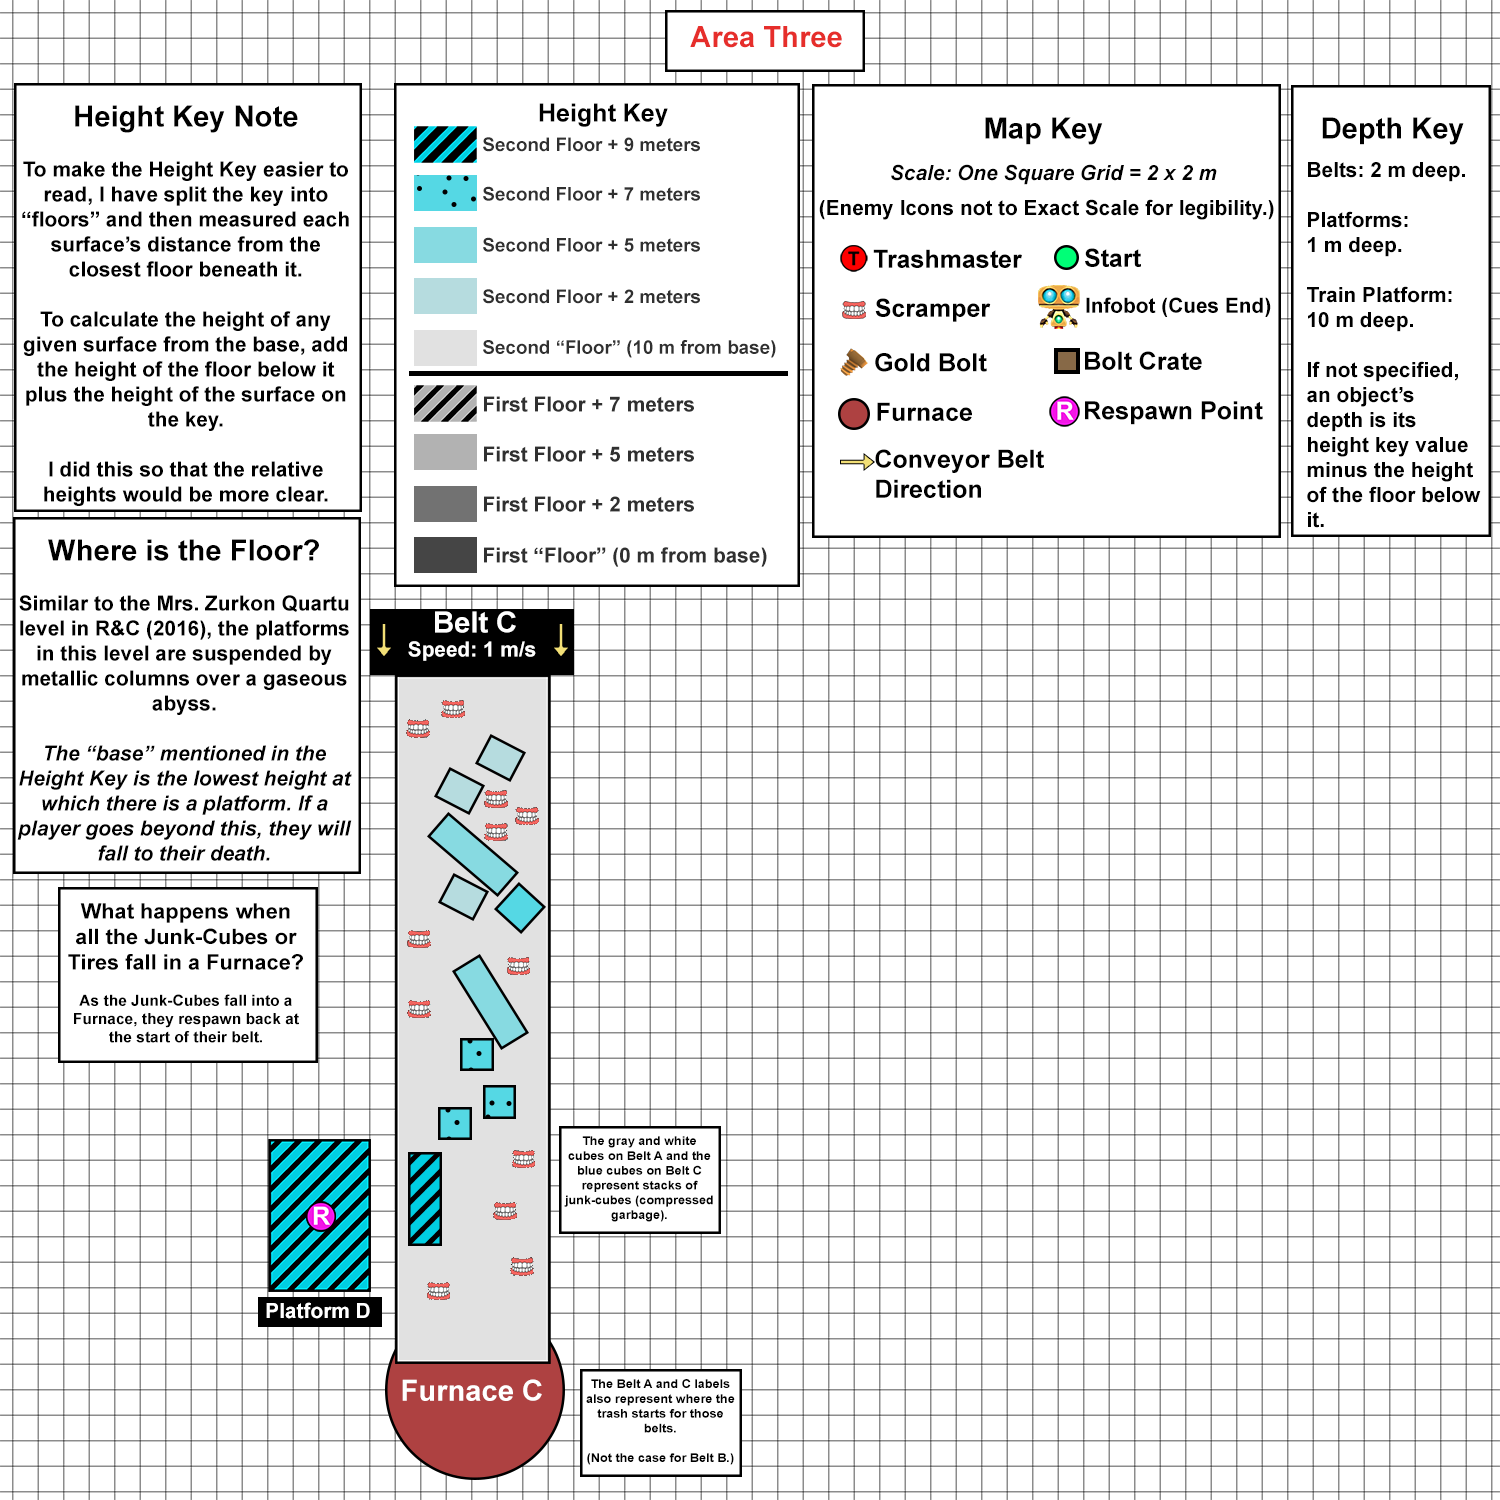

I Completed a Course on Gameplay Programming Patterns!

As a Game Designer and Engineer, I know that a strong understanding of engineering concepts can enable greater creative possibilities. So, I completed a course on Game Programming Patterns!
In this course, I learned about the following patterns. You can click on each pattern below to learn more about it.
The Command Pattern, which is useful for easily assigning and reassigning user-inputs to functionality.
The Flyweight Pattern, which is useful for creating many items that share the same attributes without sacrificing too much performance.
The Observer Pattern, which facilitates decoupled communication between classes.
The Prototype Pattern, which allows you to save on performance by cloning an existing object rather than creating one from scratch.
The Singleton Pattern, a pattern for ensuring that only instance of a class exists. It can be useful for creating universally-accessible GameManger-type classes, but can be dangerous because it can make your code tightly coupled.
The State Pattern, which is useful for programming AI behavior and functionality as a set of self-contained states.
The Object Pool Pattern, which is useful for creating a large number of similar objects. I discussed using the Object Pool pattern in depth in my earlier blog post.
These programming patterns will allow me to write more modular, robust code, which will make my work as a designer far easier to create and maintain.
I love learning about Game Design and Engineering, so if you have any recommendations for more courses on this topic or another game-design-related topic, please send them my way!
Space Force 2099: 48 Hour Virtual Production Film Project
In 2019, I worked with a team to create a five-minute, fully animated film in 48 hours!
As part of the 48 Hour Film Project, I worked with a team of about twenty-five people to create Space Force 2099, an animated sci-fi/comedy, using virtual production techniques.
I worked as the project’s Level Designer in Unreal Engine. I laid out the film’s set. I also filmed and keyframed the shot with the spaceship at the film’s start.
Through this process, I learned the basics of virtual production techniques.
Check out the film below!
Jukebox Beatdown, Producing, Games, Design, Programming, XR
Blog Post #4: The Finish Line
This most recent sprint was one of the most challenging but fulfilling sprints yet!
The end of this sprint coincided with the final submission deadline for the Oculus Launchpad program, so it was time to finish the project’s remaining essential features while also building out promotional materials and responding to playtest notes. Needless to say, I didn’t sleep much. 😊
The Oculus Launchpad program only distributes grants to a handful of its more than 100 participants based on the merit of their vertical-slices, so my demo had to be looking and playing its best. I didn’t have the money to continue building Jukebox Beatdown beyond my vertical slice, so the project’s survival depended on the grant.
For my project to be eligible for Oculus’s consideration, it had to meet the following requirements:
Provide a complete experience in five minutes or less.
Meet the Oculus Store’s technical standards, especially in terms of performance.
Be accompanied by at least a basic press kit.
In this post, I’ll discuss how I reached each of these goals, which are divided nicely into the categories of Design, Engineering, and Marketing:
DESIGN: Building the game’s five-minute demo by scripting the attacks of Funky Franny, the game’s first boss. By doing so, we hoped to achieve the game’s central promise of boss-fights set to music.
ENGINEERING: Optimizing the game so that it met the Oculus Store’s technical requirements (and didn’t trigger VR-nausea).
MARKETING: Building a professional and exciting presence for the game online through my press kit.
The final banner art for the project.
Design
This was far and away the most fun sprint of this game’s production because I finally had the technical foundation to fulfill the game’s central promise: boss battles set to music.
Like the movie Fantasia, we wanted all the bosses in Jukebox Beatdown to have their actions choreographed to music.
This was an intimidating goal. The song I commissioned for this project had multiple saxophone, horn, drum, synth, bass, guitar, string, and keyboard tracks each with either a unique melody or rhythm. It was a bit overwhelming to decide which sound would be paired with which attack.
To make this process easier, Ben Young, the game’s composer, designed our song so that it had four distinct, self-contained phases. We thought that these self-contained phases would make it easier for the player to notice when the music matched with the action of the game.

A screenshot of the Ableton project for the game’s song.
To cut through the noise (pardon the pun), I made a list with two columns for each of these four sections. One column had all the tracks in that section (saxophone, guitar 1, guitar 2, etc.) and the other column had a list of attacks I could create for the game. This list was an anthology of riffs on attacks I had seen in other games with great bosses, such as Dark Souls 3, Cuphead, Titan Souls, and Furi, plus some inventions of my own.
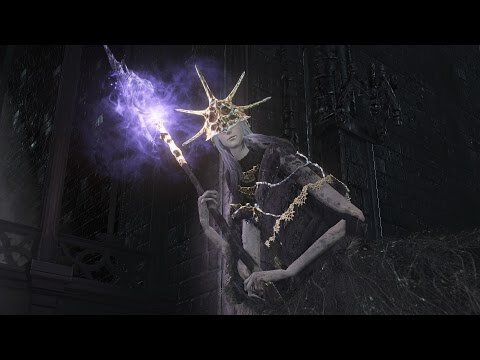
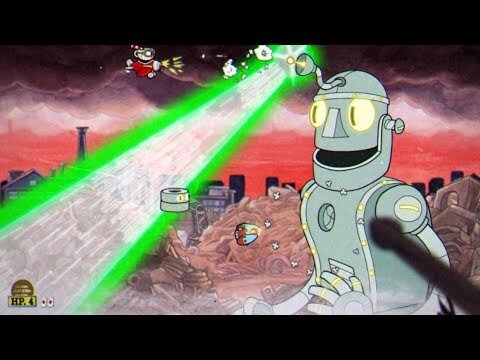
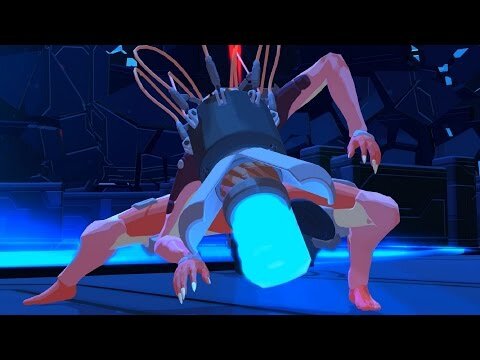
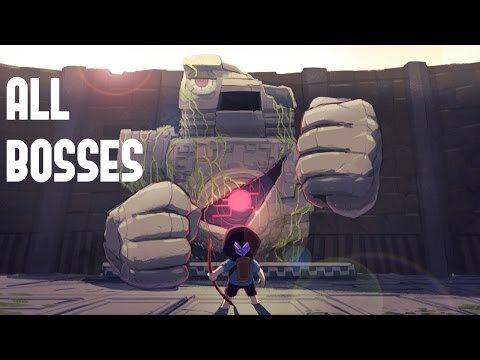
From there, it became a jigsaw puzzle of music, visuals, and gameplay. Using the music, which was basically set in stone, as a starting point, I tried to pair the attacks and music together. The design process was complex and went like this: what fits a guitar melody better, a flurry of lasers or a series of rapidly-exploding bombs? If I tie the lasers to the guitar, that means I can’t use them for the saxophone, so what should I tie into the saxophone? If the lasers are more difficult than the bombs, maybe they should be with the saxophone, which comes in predominantly at the end of the song – but now I am using the bombs for the horns, so what should go with the guitar now? Moving one element displaced another.

This process of experimentation continued until we had built out the first several phases of Franny’s fight:
However, now that we had added all this new content, our framerate had dropped into the teens. It was time to put our engineering hat on and optimize the project.
Engineering (Optimization)
From an engineering perspective, VR development can be one of the most challenging forms of game development. One of the main reasons that VR development is so challenging is that the slightest amount of lag can make someone sick. If you’ve ever played a new game on older hardware, you’ve probably noticed the game’s graphics lagging for a moment before updating to where they should be. This is never desirable but is especially unwanted in a VR context because the slightest amount of lag can cause the player to get nauseous.
The dangers of lag.
People get nauseous when the stimuli that their eyes are receiving does not match the stimuli that the vestibular system in their ear is receiving. (The vestibular system gathers and transmits data about our body’s position through several organs in our ear.) To minimize the difference between what these stimuli, Oculus requires all desktop-connected VR content to run at 90 frames per second.

Not my diagram. I would credit this but the original link is now a 404.
Unfortunately, after my first design pass, my game was running at around 15 to 30 FPS at worst on my mid-range Razer laptop. To hit 90 FPS, I had to use many optimization tricks, including:
Using object pools as I mentioned in my previous blog post.
Eliminating almost every unnecessary UI canvas object from my scene in Unity as they were constantly being recalculated, putting unnecessary stress on my CPU.
Eliminating almost every dynamic light in the scene and replacing it with lightmapping, which is essentially the practice of “painting in” a scene’s lights and shadows beforehand than simulating those at runtime.
However, the most impactful step for me was reducing my draw calls.
A draw call is the directions that a CPU (Central Processing Unit) gives to the GPU (Graphical Processing Unit) about what to render in a scene. Specifically, the draw call is the information that the GPU needs to render each object in the scene. While most computers’ GPUs do not struggle to execute these directions once received, preparing these directions puts significant strain on the CPU, which results in lag.
To use a filmmaking metaphor, you can imagine the CPU as a location scout and a GPU as a lightning-fast set-builder. In the context of the metaphor, the CPU is visiting the “real location” and sending instructions back to the GPU on what to build in the movie-set. The CPU/location scout looks at objects that make up the “real location” and communicates every visual detail about them to the GPU/set-builder, who recreates them. However, to extend the metaphor, the CPU/location-scout is using a slow fax machine, so sending these details to the GPU/set-builder takes a long time and can slow down the entire process. Thus, the more succinct the directions can be, the faster the GPU will be able to build the set. We’ll use this metaphor as a way of explaining some of these optimization techniques.
Below is a timelapse that shows a scene in Jukebox Beatdown being rendered one drawcall at a time.
To reduce my draw calls, I used two techniques: mesh-baking and texture-atlasing.
Mesh-baking is when a developer takes several meshes (3d models) in their level/scene and turns them into one mesh. If we bake three meshes into one, our CPU will now need to process one draw call for those three meshes instead of three. In the context of Jukebox Beatdown, we generally baked together most meshes that shared the same shader, which is code that dictates how an object reacts to light. Our floor, for example, was made of about sixty different meshes; we baked these into one object.
To continue our movie metaphor, now that the meshes are baked together, our CPU/location-scout can describe, for example, a group of ten stereos as a group of ten stereos rather than communicate information about each stereo one-by-one. Put another way, it’s the difference between counting bowls of rice versus counting individual grains of rice. Preparing and sending the directions is the bottleneck in this context, so using succinct instructions is paramount.

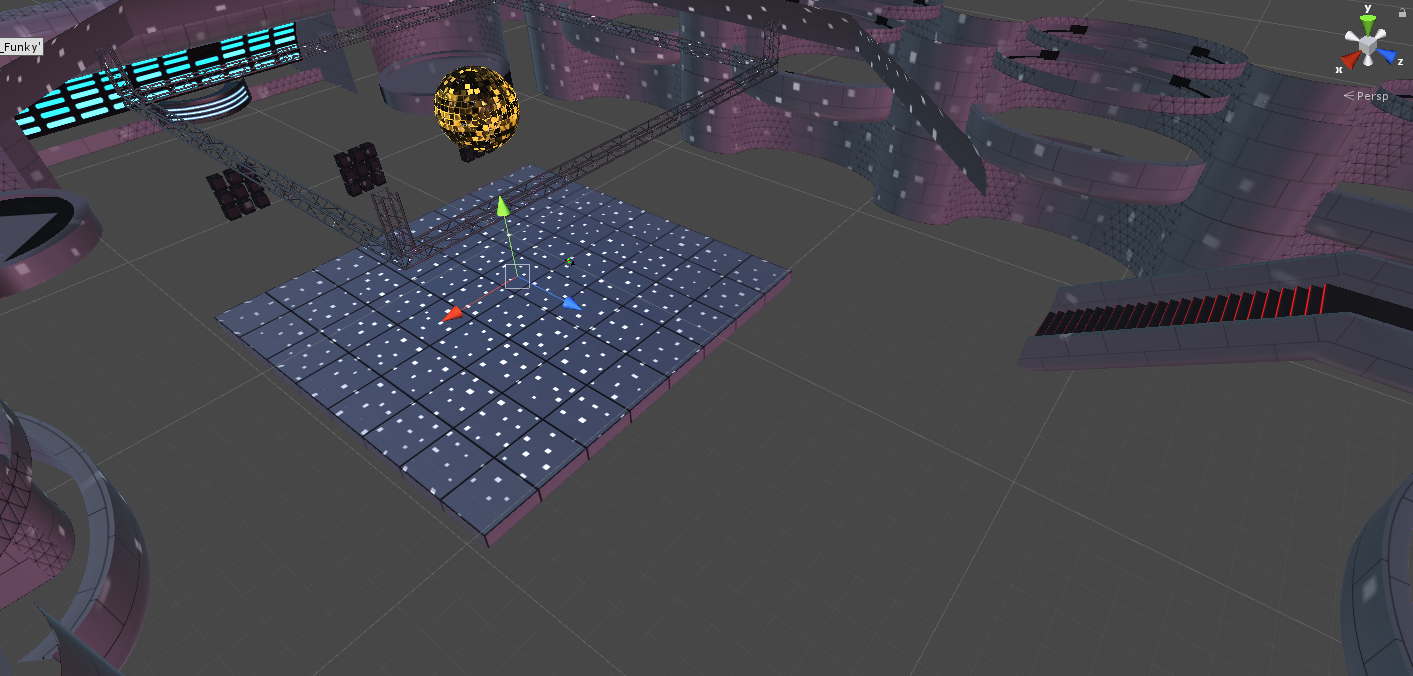

Texture-atlasing is the process of aggregating all a game’s textures onto one image file. If a project is not texture-atlassed, every texture in the game is contained within a unique image file. The problem with this setup is that as the number of unique images go up, the number of draw calls go up as well. So, in order to minimize the number of images that need to be sent by the CPU, developers will pack as many textures as they can onto one image or texture atlas. The GPU will then look at this atlas for every texture that it needs.
In our location-scouting metaphor, texture-atlasing would mean that instead of taking pictures of every scene in our metaphorical “real-location” and sending them through the slow fax machine, our CPU is instead sending one page that contains all the pictures.

A texture atlas for the buildings in a virtual city.
All these changes together helped us reach our technical performance goals. Now, it was time to make sure our project’s marketing was as engaging as the project itself.
Producing
The Oculus Launchpad program is highly competitive, with only three to five grants awarded to around fifty entries. I knew that some of the other entrants had teams that were five or more people strong (compared to my two) and had significantly larger budgets than I did, so I knew my project needed to look as polished and exciting as possible.

At the Oculus headquarters in San Francisco area for the presentation day.
For my project to receive the grant, it had look professional. I knew that I had the skills to reach the required level of polish as a designer and a programmer, but maybe not as a voice-actor, graphic designer, or 3D modeler. Even if I did have the skills for those later responsibilities, I knew I didn’t have the time to do them all.
I had a $200 and a month to get the project ready for Oculus.
To ensure that I would get everything I needed by the grant deadline, I made a list of what features and assets would constitute the vertical slice of Jukebox Beatdown and then planned backwards from that date (February 28th). I then prioritized each of these items by how important they were and how much lead time they would need in order to be completed. My scrum training came in handy here.
From there, to decide which items I would outsource, I took a “time is money” approach. I estimated how long each item would take in hours if I did them myself and then multiplied that number by my hourly pay. I then compared how much it would cost to pay someone to do the same job on Fiverr. When a task was significantly cheaper to due via Fiverr, I outsourced it.
Ultimately, I ended up outsourcing a considerable amount of work, including the voice-acting, poster design, logo design, and character artwork. I spent $200 between several vendors to get all these items. This amount of work took about two weeks to be delivered.
In the gallery below, you can see the final artwork followed by the original sketch I sent to the Fiverr artists:


To do so, I started using Fiverr, a freelancing website, which was a great experience. If you decide to use Fiverr for your work, consider using my referral code, which will give you 20% off your first order: http://www.fiverr.com/s2/5b56fb53eb
Full disclosure: I will receive Fiverr credits if you sign up with the above link as part of their referral program. I am not affiliated with them in any other way. My opinions are my own.
Presentation
With my game built, optimized, and marketed, it was time to present to fly to Menlo Park, CA and present the game:
next Steps (Several Weeks Later)
Unfortunately, Jukebox Beatdown did not win any of the Launchpad grants. However, I am very happy with the project and will be polishing the vertical slice for release on itch.io so that others can play it.
Amongst other small tweaks, this next sprint will be about:
Adding more attacks to Funky Franny’s moveset.
Adding a system that ranks the player’s performance within the boss battle like this.
Giving the game more “juice,” which means to make the game feel more visceral.
Thank you for following the development journey of Jukebox Beatdown! You can expect one or two more blog posts about the project followed by a release on itch.io!
Jukebox Beatdown, Awards and Festivals, Design, Games, XR
I Gave a Talk About my Game Jukebox Beatdown at the Oculus/Facebook Headquarters!
In February, I had the chance to talk about my rhythm-combat game Jukebox Beatdown at the Oculus / Facebook headquarters as part of the Oculus Launchpad program’s Demo Day!
During Demo Day, all of the Oculus Launchpad members are invited to Northern California to present their projects to the Oculus leadership and the other Launchpad members.
Check out a recording of the talk below!
I've Started a New Job as a Game Designer!
I’m excited to announce that I have started a new job as a Game Designer at Cinémoi, a television network focused on film, fashion, and international style.
I’m helping design CinémoiWorld, a new mobile multiplayer game set within the wider Cinémoi universe of film, fashion, art, and music.
As a Game Designer, I am:
Part of a two-person team designing the core game loop.
Designing mini-games within the core game loop.
I cannot share many more details at this point, but will update the blog with publicly-available information on the project as it is published by the company! We are working on exciting stuff!